Fill to the Max

This is going to be another recipe designated as “healthy.” It happens to involve lentils again, and I’m sorry for the lack of variety so far in that department. I swear I’m not that obsessed with lentils. Though it is impressive how satisfying they can be, acting as a protein-provider in the absence of meat. Vegetables are the star in this one.

Let me talk a little bit about the ingredients. This recipe calls for another one of those herb bunches, this time: mint.
DSC_4352
I had bought the mint a few days earlier, actually, to use in a recipe for chicken biryani. Where is this recipe, you ask? Well, it wasn’t exactly…good. My version of this Indian rice dish with spices turned out bland! There were a few problems. Even though I went as far as to use some whole spice freshly ground, I didn’t have all of the exact spices. (Apparently, BLACK cumin seeds are a critical ingredient in garam masala). And I was cooking with a friend with whom I was also catching up, and I was distracted and didn’t taste until it was too late (thank goodness Tom Colicchio wasn’t judging). We all ate it anyway, of course, with the help of good old pepper and salt. Perhaps I’ll try this again and apply what I learned and tell you about it then.

DSC_4371

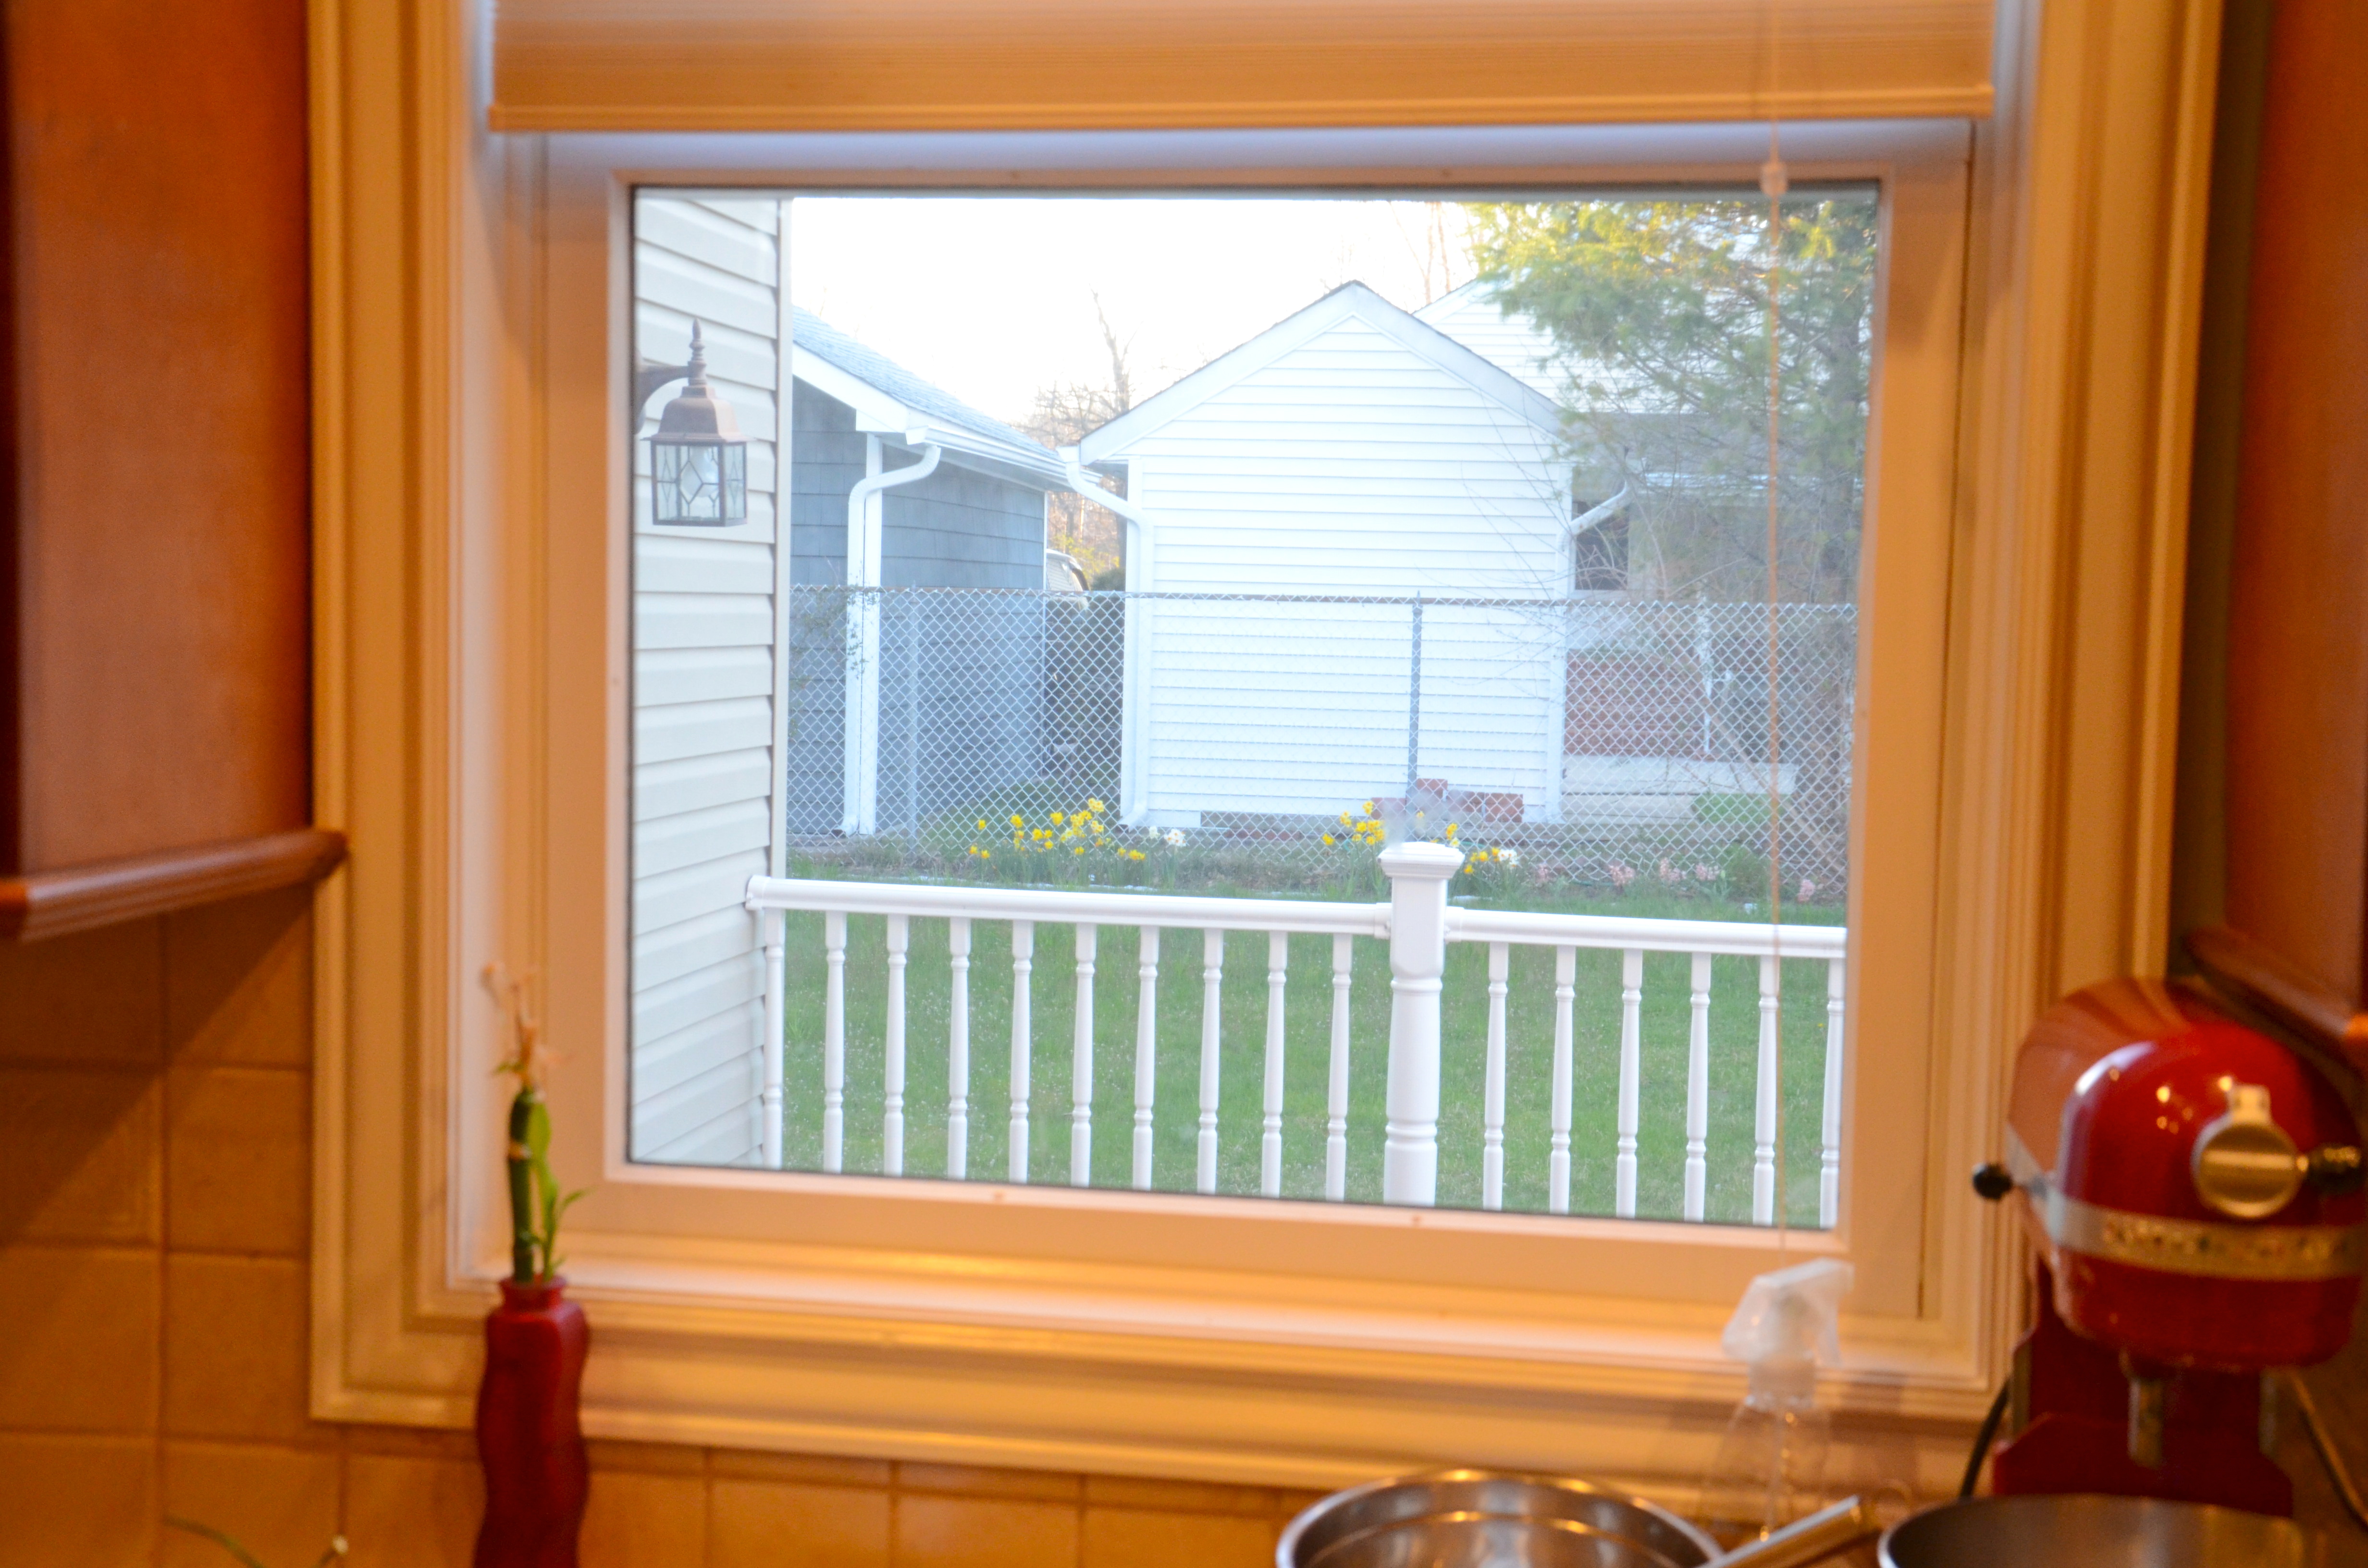
Please forgive the white balance problem with this picture. One of these days I’ll work on photo editing. My kitchen window frame and walls are not actually that yellow-orange.

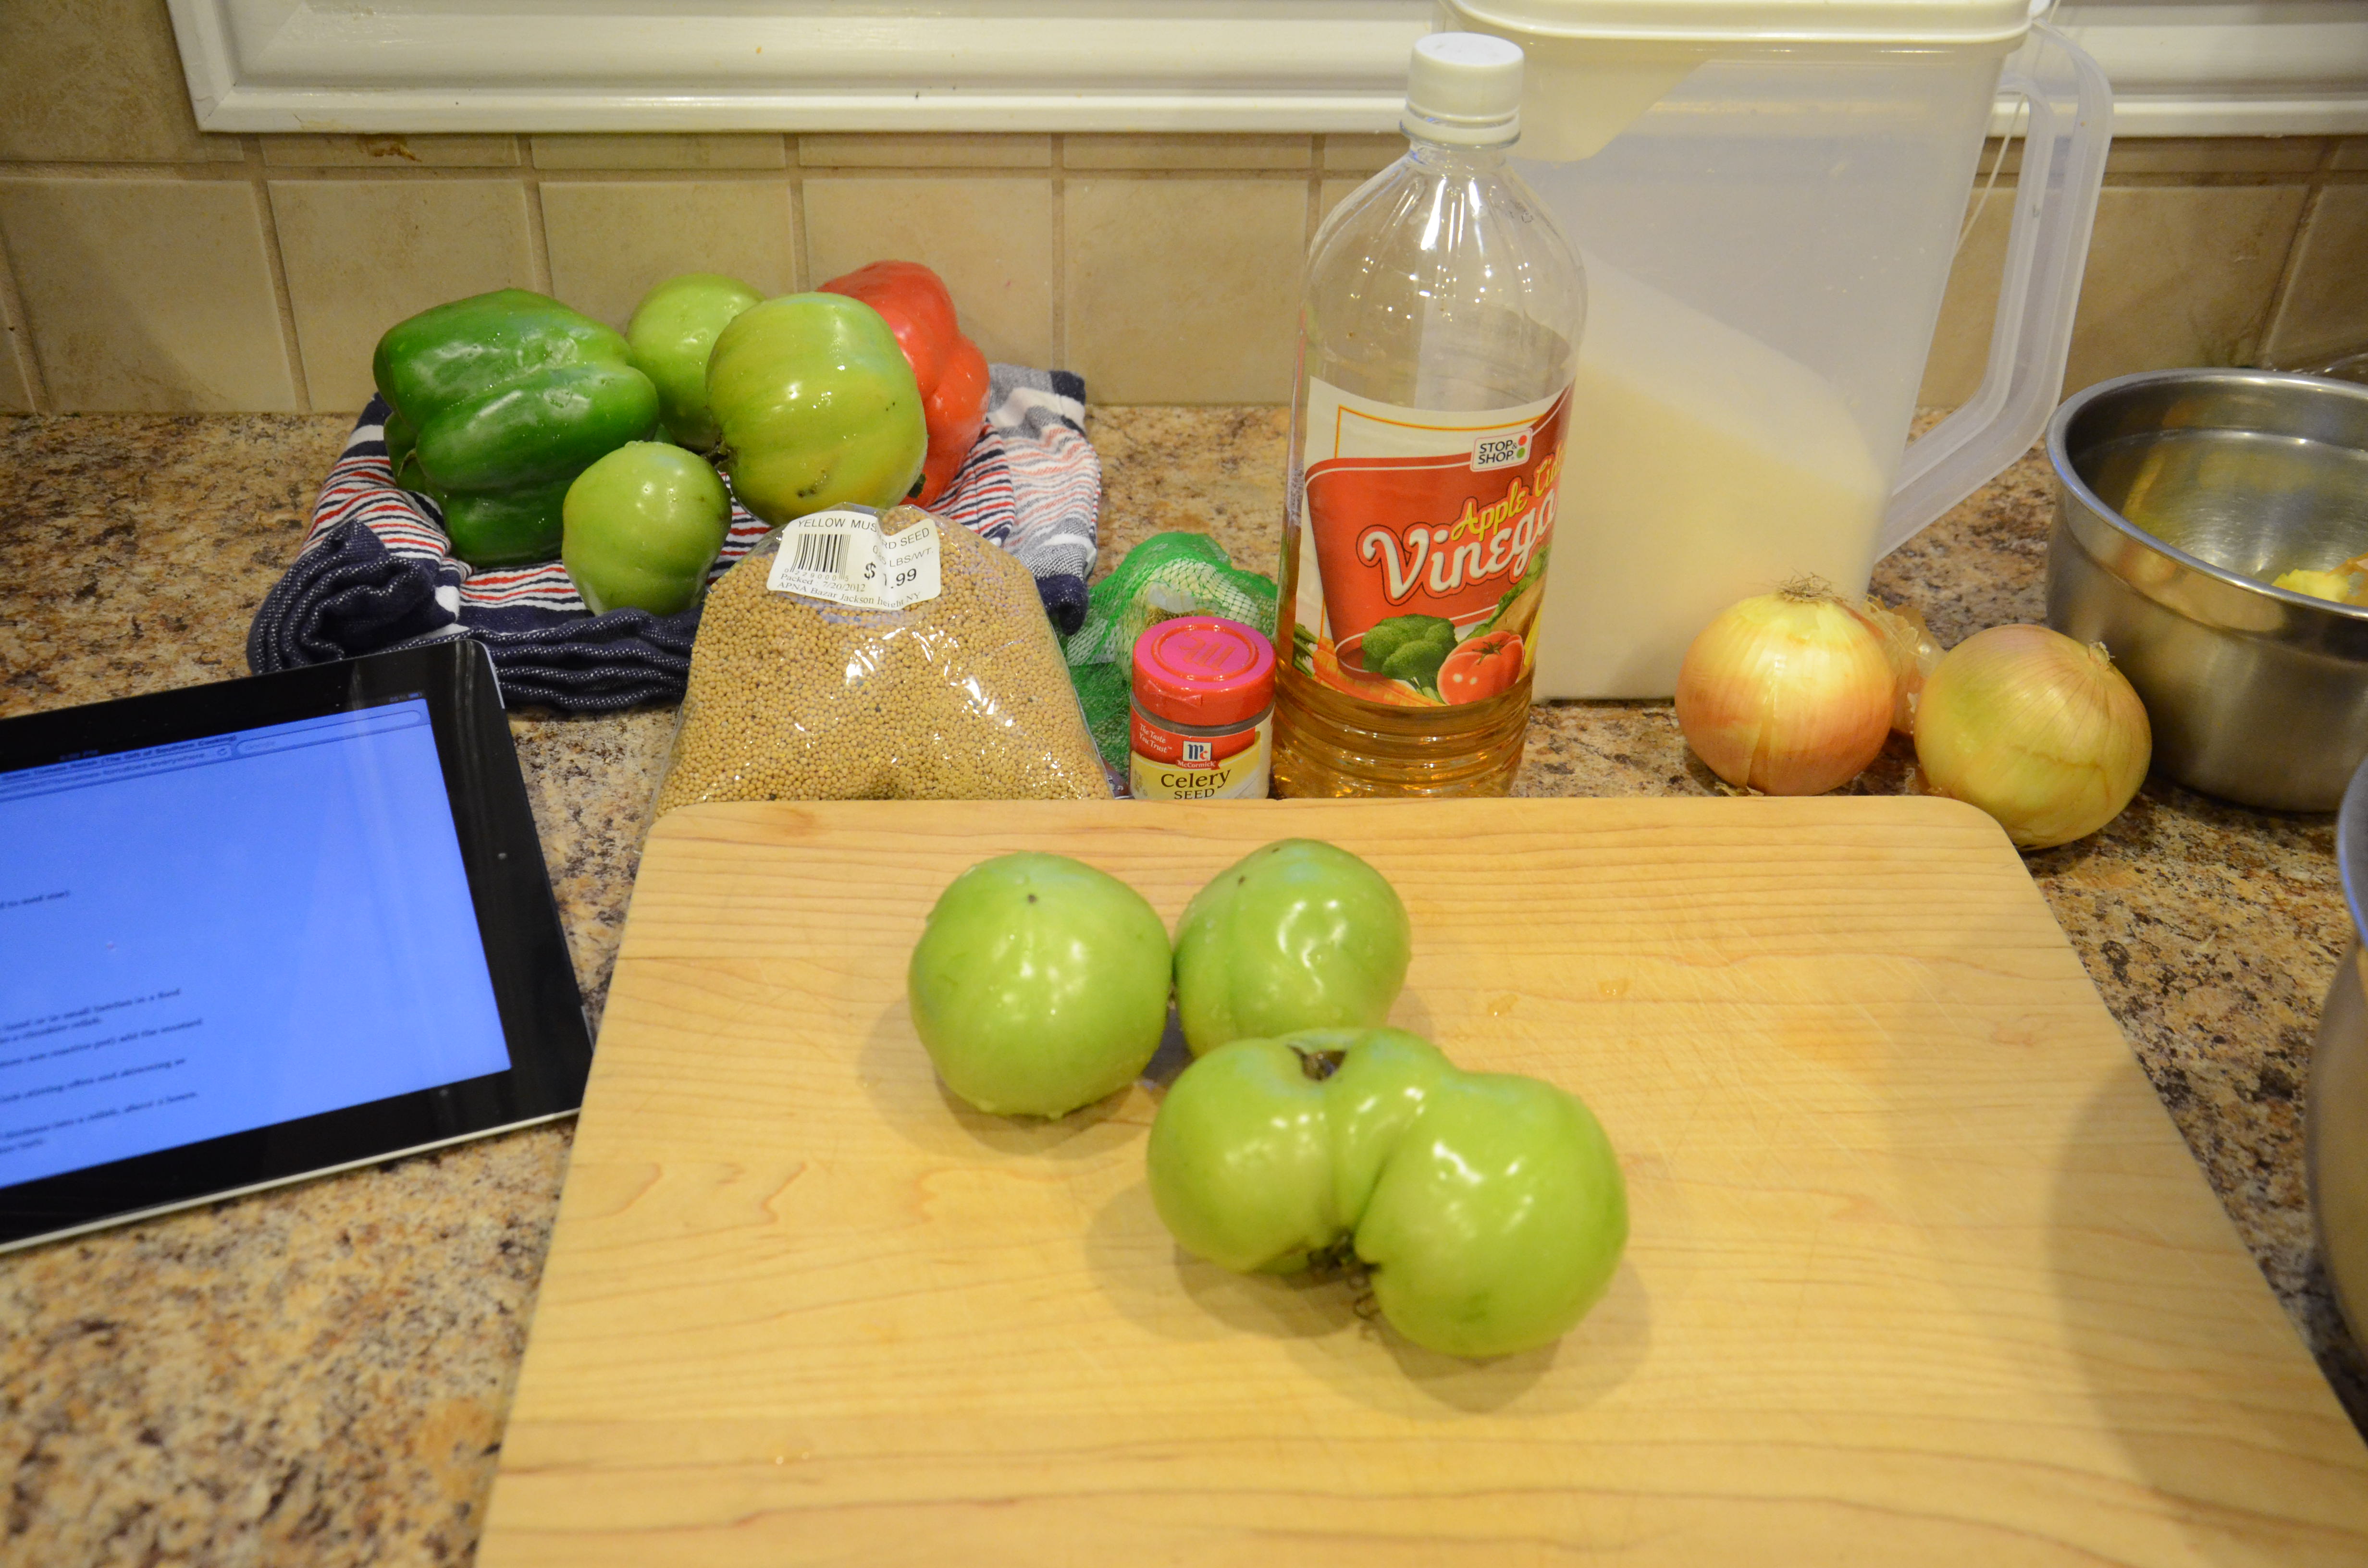
I picked up the asparagus, red pepper, and red onion for this recipe. My red onion was actually large enough that I used half of it thinly sliced in a simple salad with two small fresh vine tomatoes, chopped and one sliced avocado in a cider vinegar/lemon-lime juice vinaigrette (to satisfy a craving for a dish that had been served at Matt’s Aunt and Uncle’s Easter feast). Asparagus represents Spring, of course. In fact, it was a beautiful, bright sunny afternoon/evening when I made this food, with the early bulbs in bloom in my garden. Here’s a look at the view of my back yard from the window by my kitchen counter:

And I love, love, love keeping goat cheese on hand. I can eat that stuff with almost anything–greens, vegetables, legumes, grains, pasta…you name it. Remember, I had it on the kale pizza last week.

Let’s get to it:

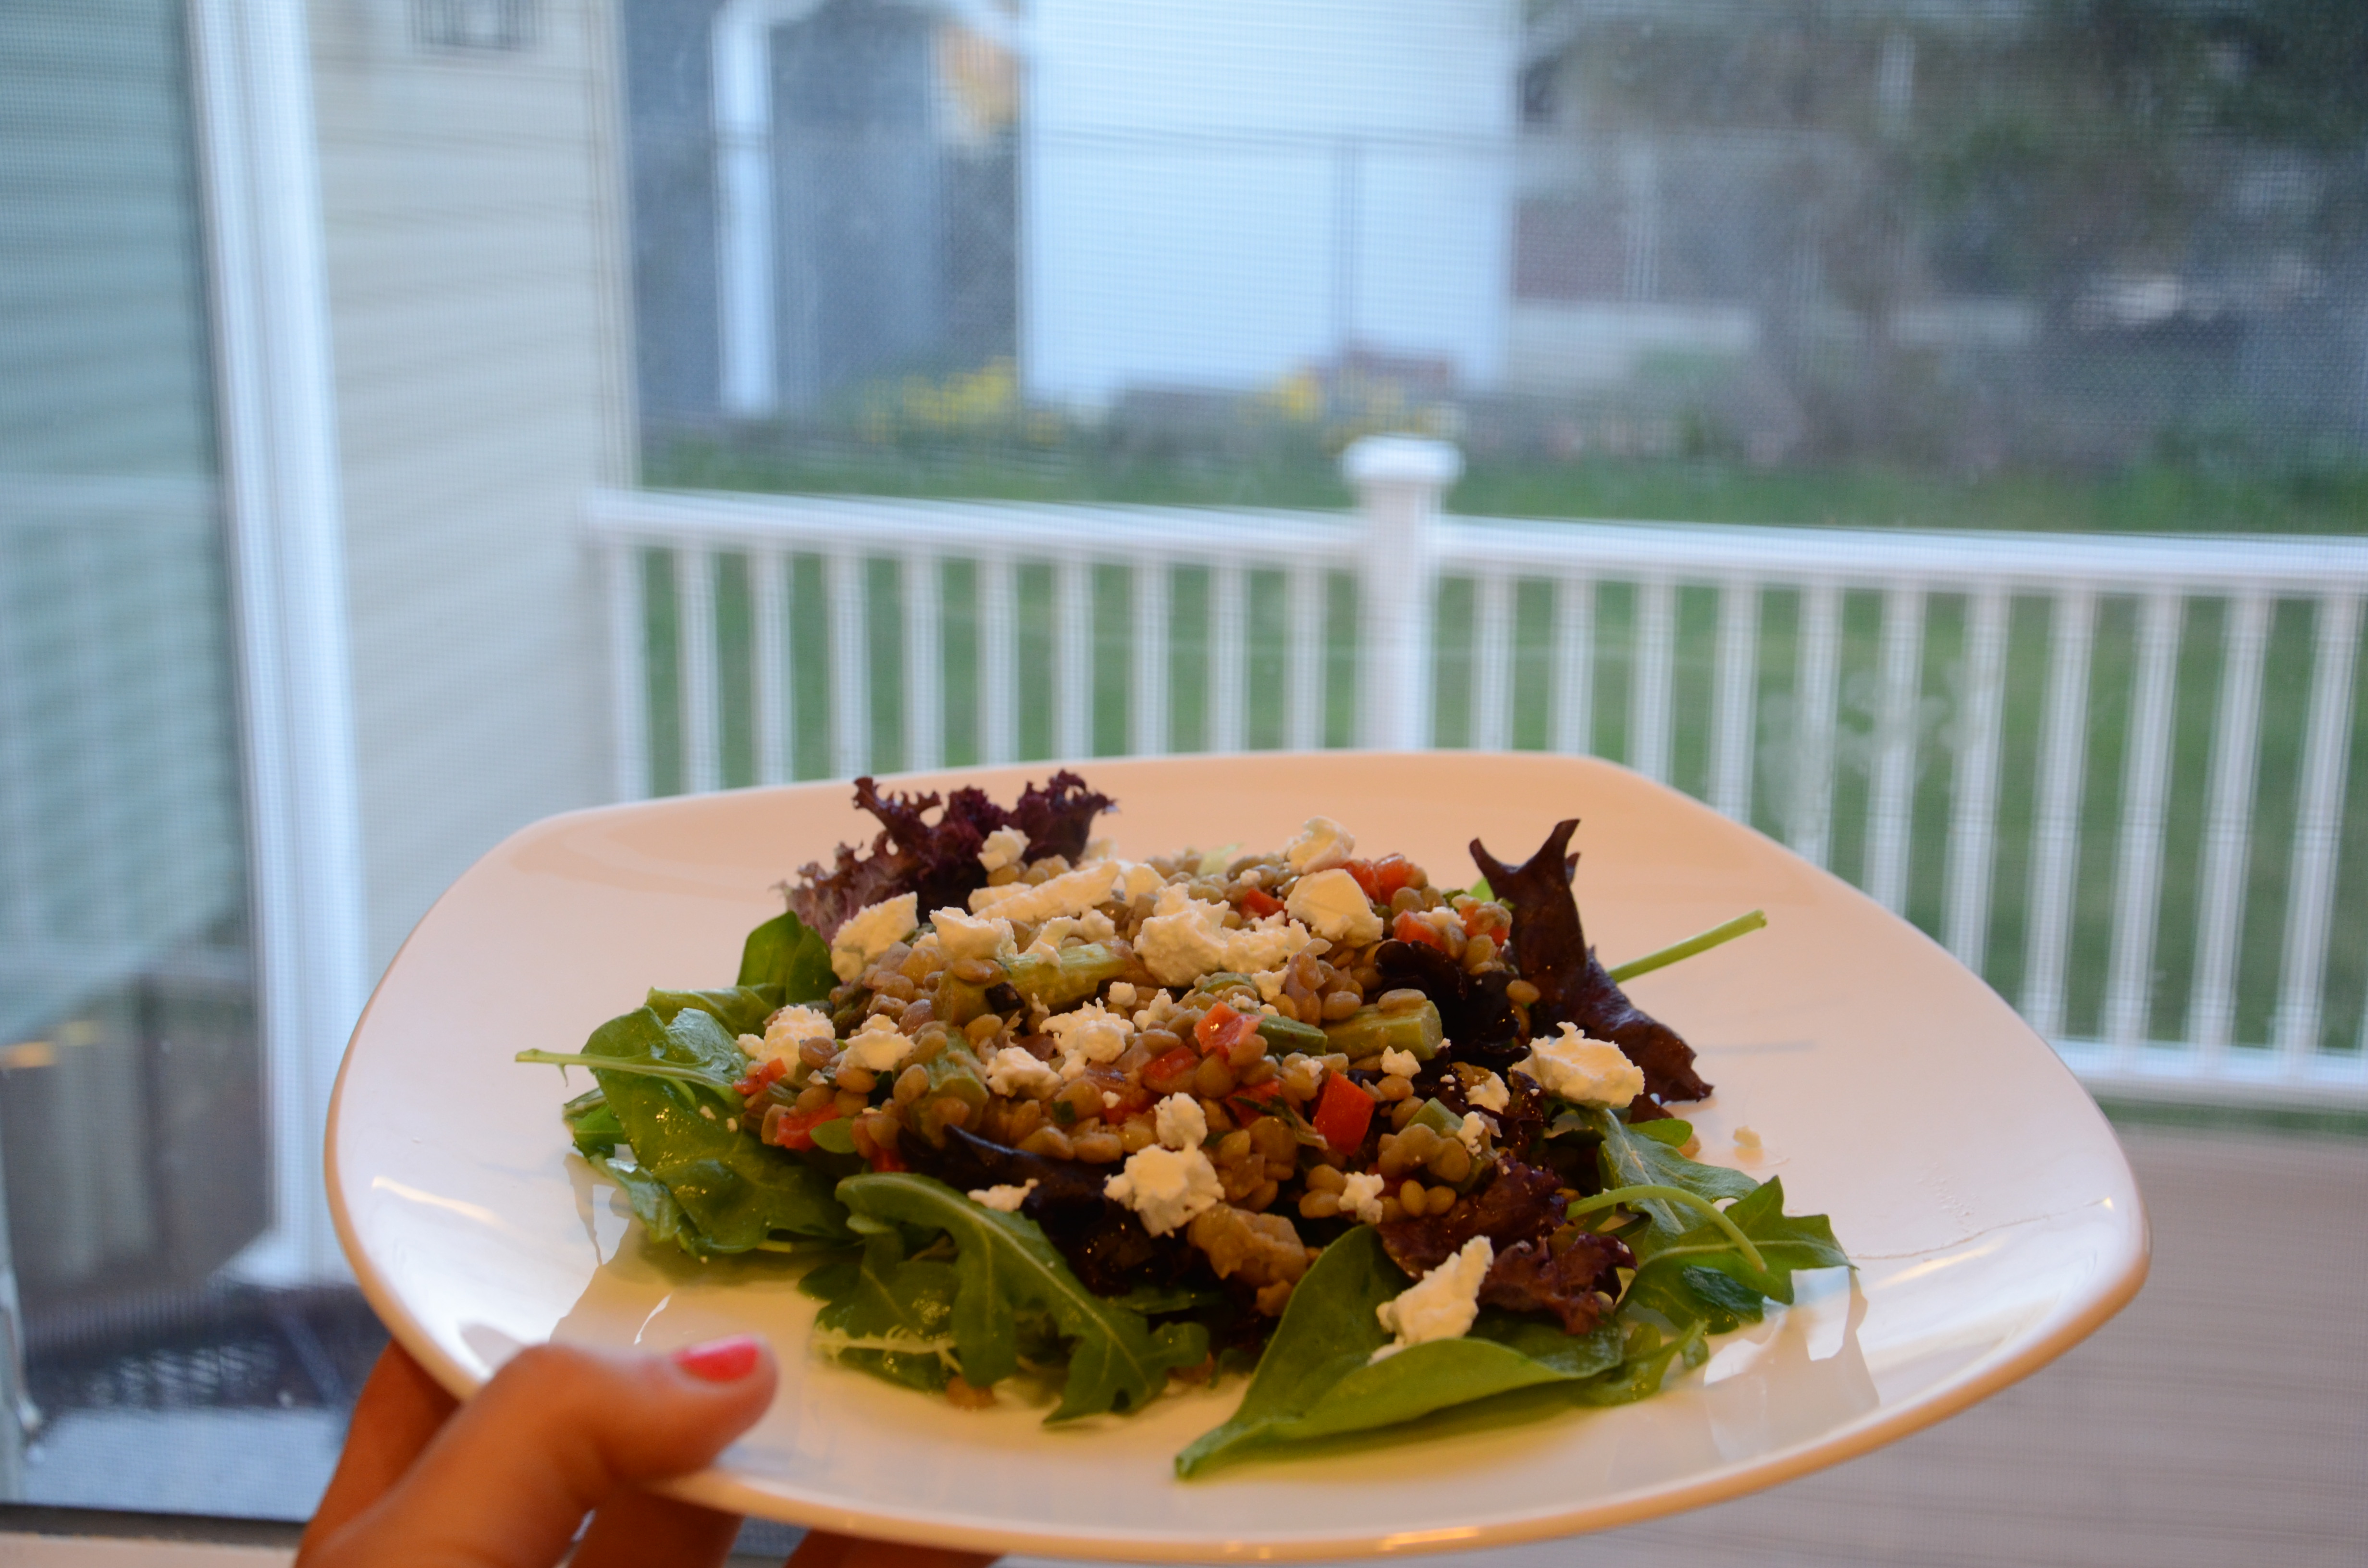
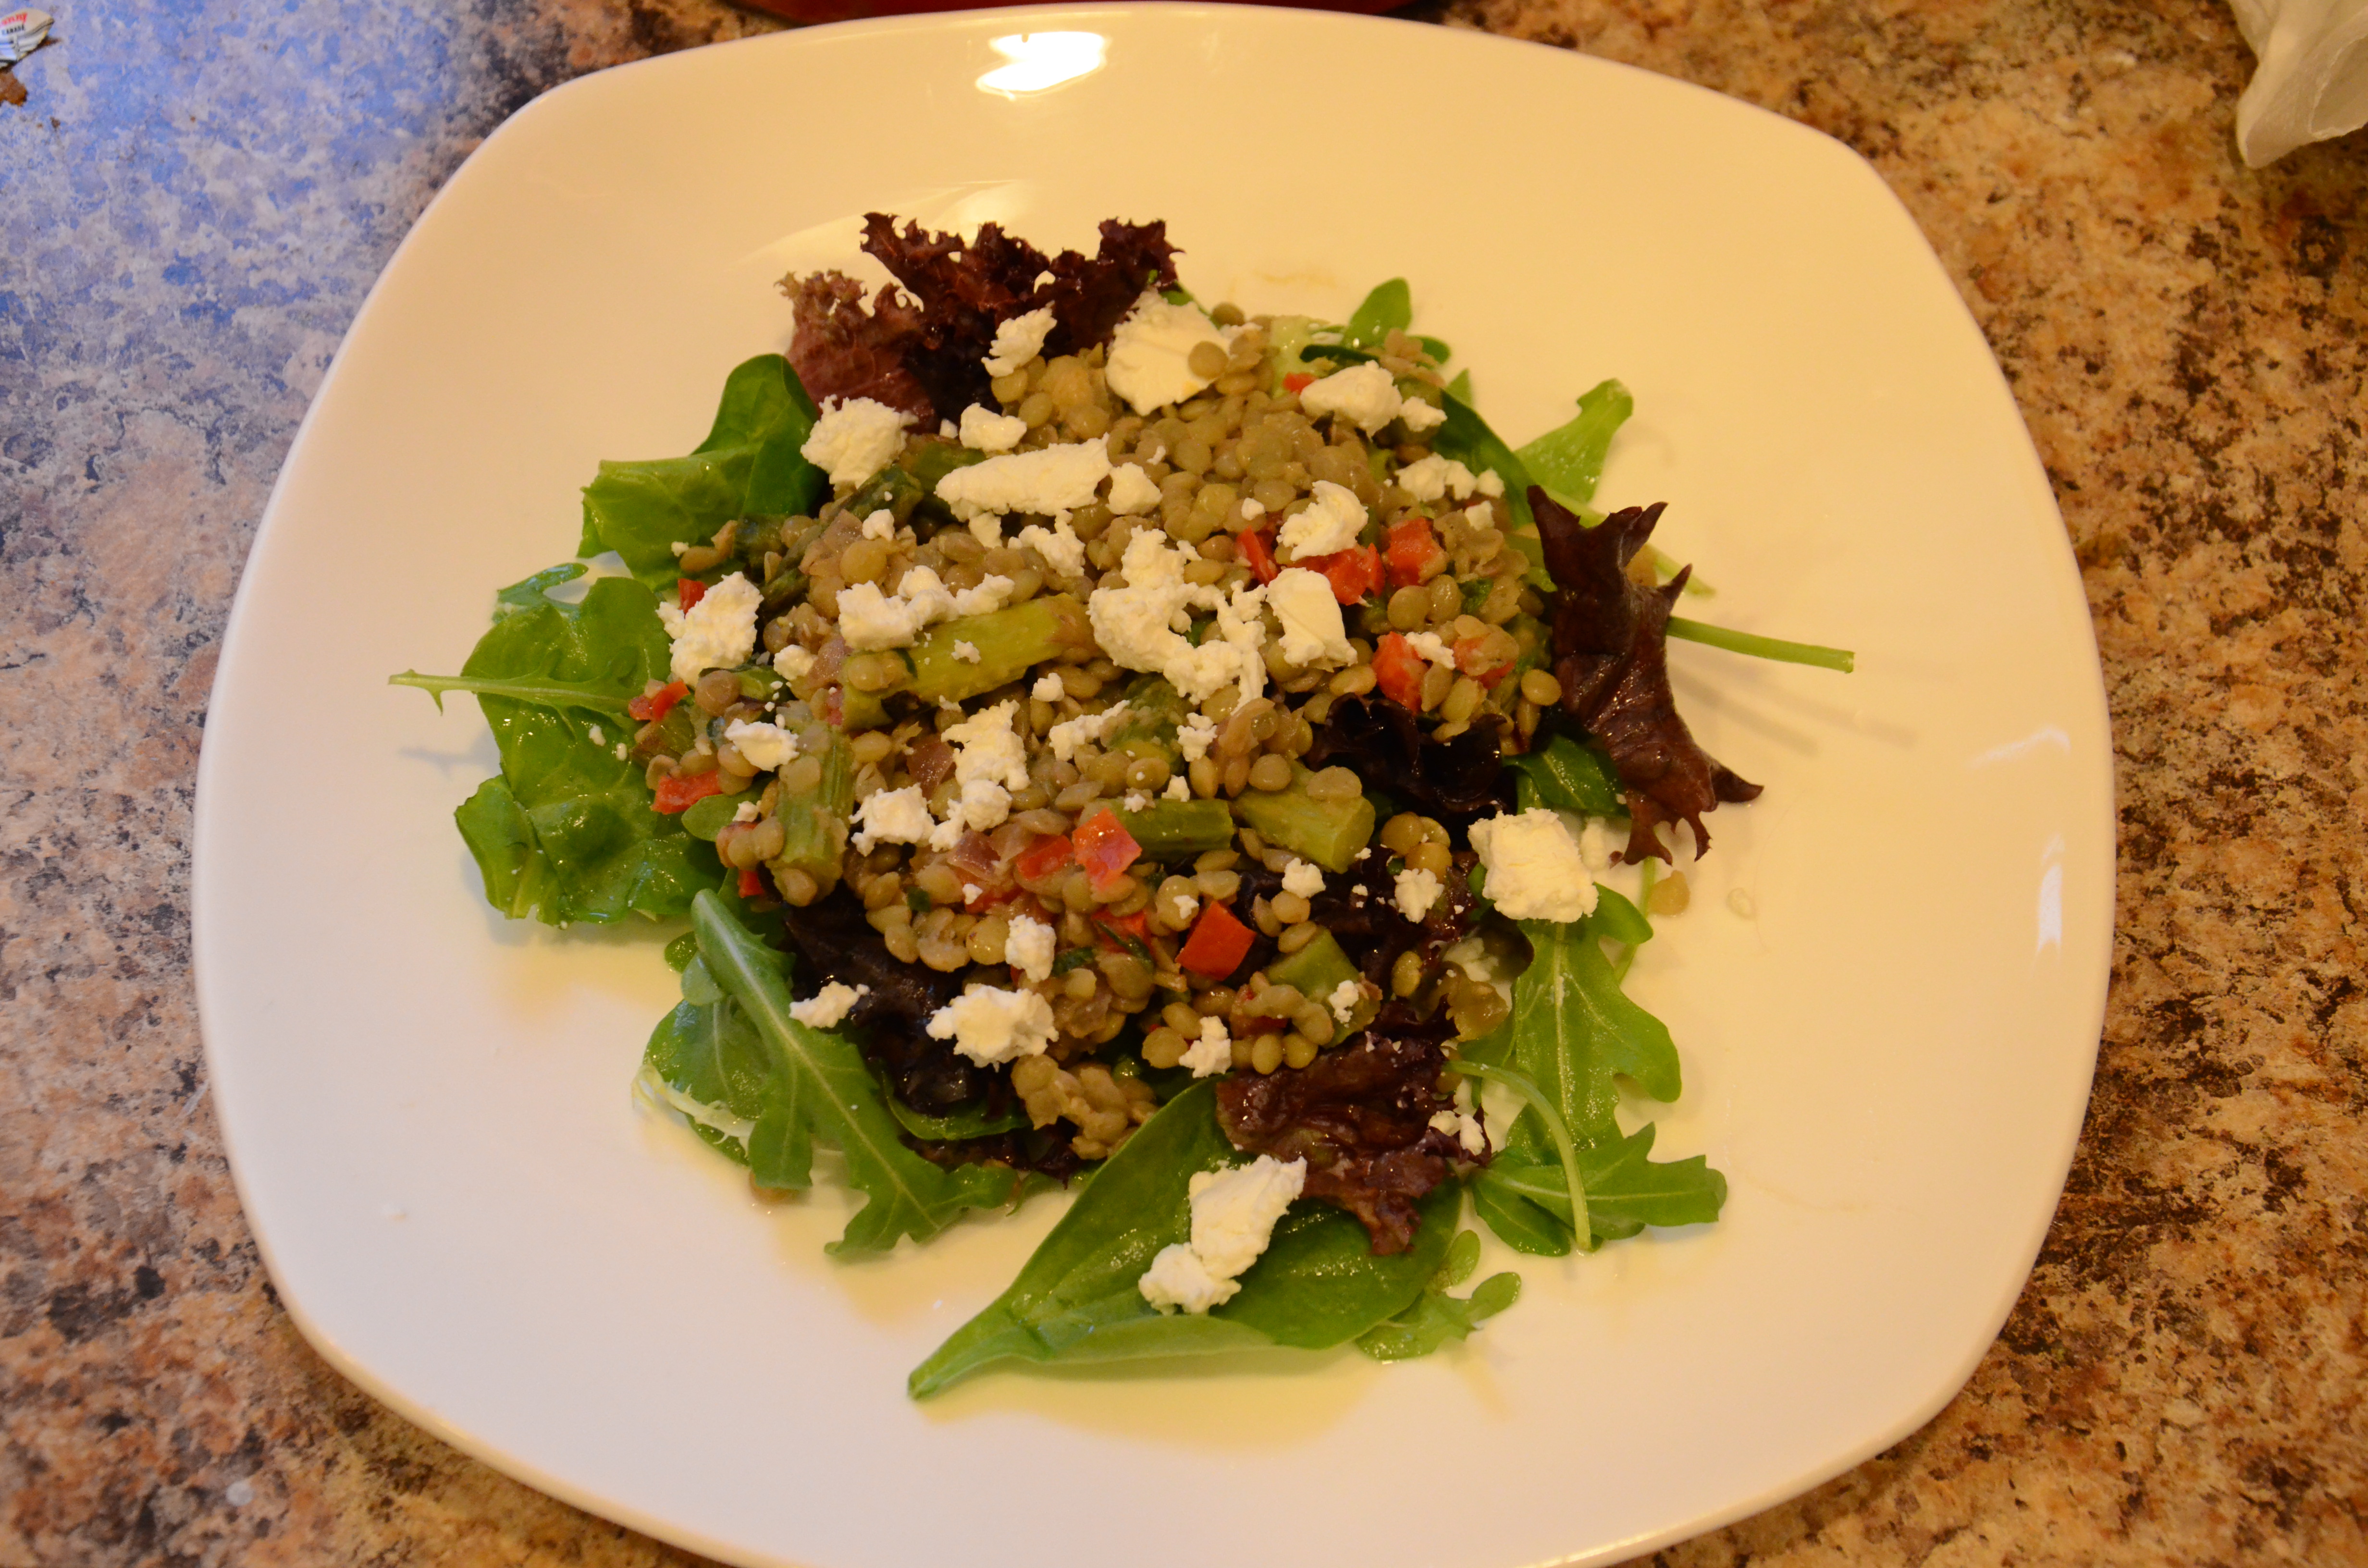
Lentil Salad with Roasted Veggies
from Good Housekeeping‘s March 2013 “Dr. Oz’s 7-Day High-Energy Meal Plan” article
2 cup dried green lentils, rinsed and picked through
1 pound asparagus, trimmed and cut into 1-inch lengths
1 small red pepper, chopped
1 small red onion, chopped
1 tablespoon olive oil
3 tablespoons extra-virgin olive oil
3/4 teaspoon ground cumin
1/4 cup (from 2-3 limes) fresh lime juice
1/3-1/2 cup fresh mint leaves, finely chopped
Mixed greens
2 ounces soft goat cheese, crumbled

Preheat the oven to 450 degrees F.

In 4-quart covered saucepan, heat 6 cups water to boiling on high. Stir in lentils. Reduce heat to maintain simmer. Simmer, covered, 25 to 30 minutes or until tender, stirring occasionally. Drain well.

Meanwhile, in large jelly-roll pan, toss asparagus, red pepper, and onion with 1 tablespoon olive oil (regular olive oil stands up to heat better), 1/2 teaspoon cumin, and 1/4 teaspoon each salt and black pepper. Roast 18 to 20 minutes or until tender, stirring and turning pan halfway through.
DSC_4350
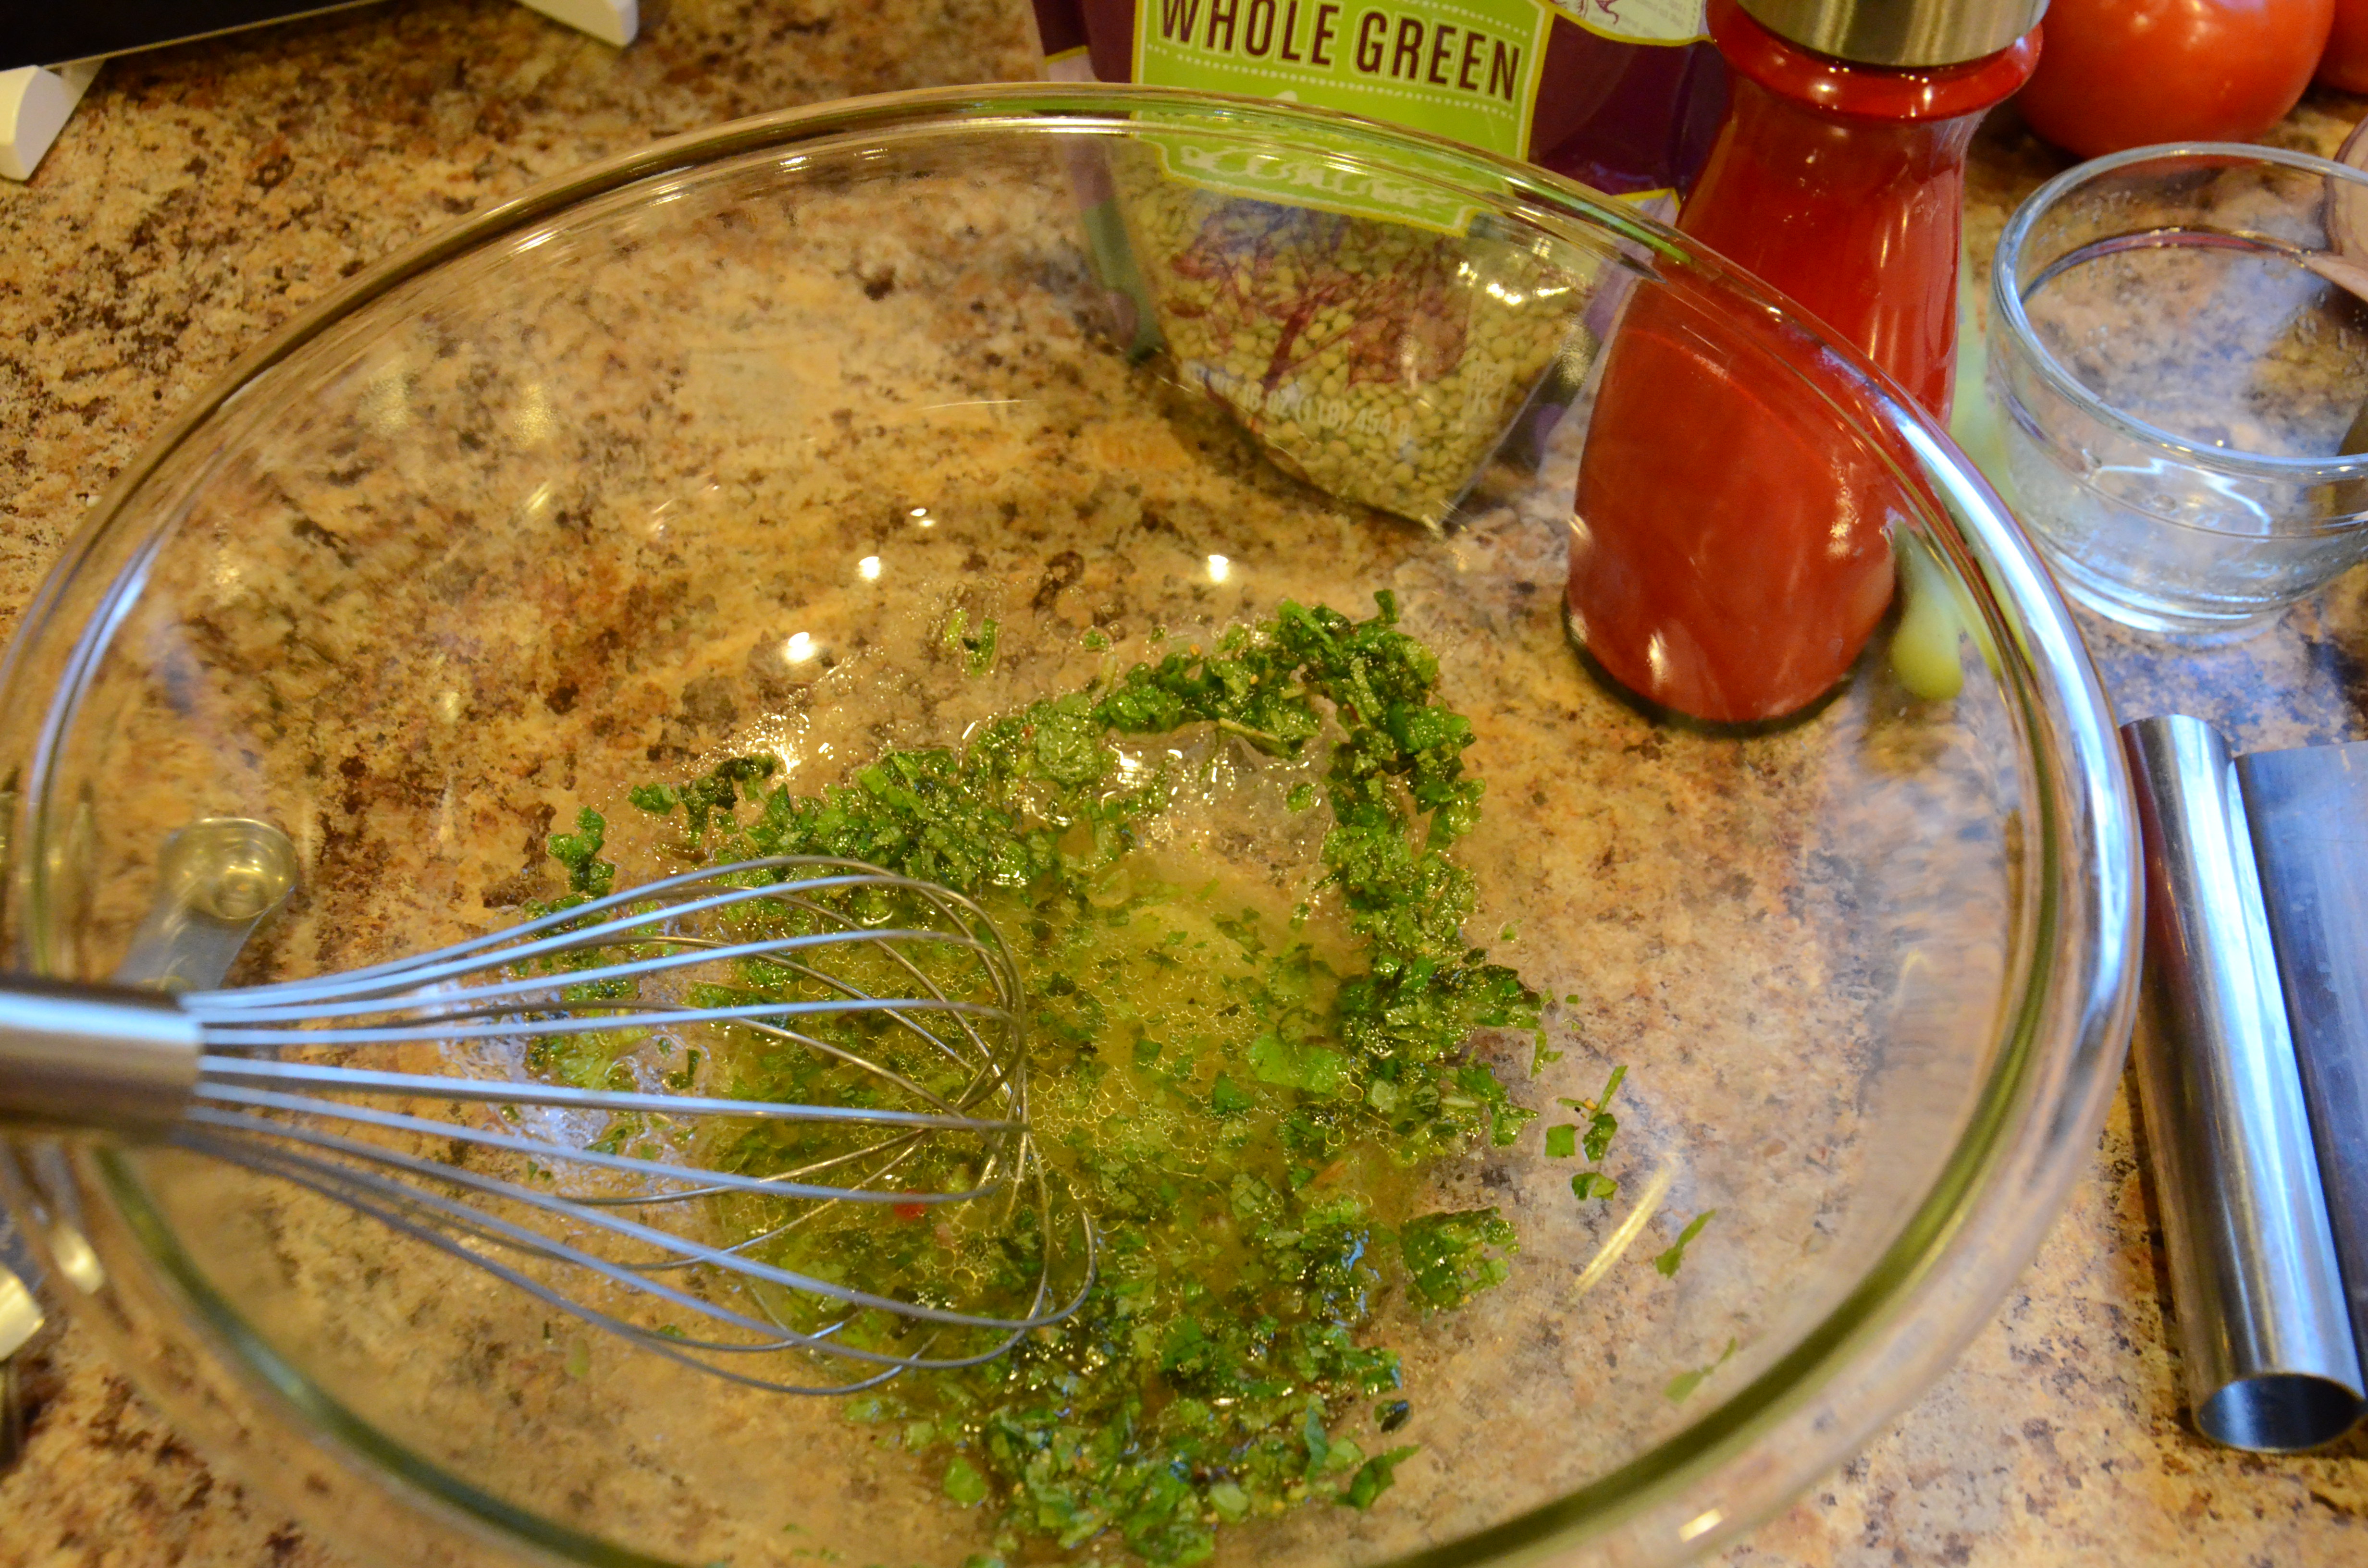
For the dressing: in a large bowl, whisk together lime juice, mint, 3 tablespoons extra-virgin olive oil, remaining 1/4 teaspoon cumin, and 1/4 teaspoon each salt and black pepper.
DSC_4358
DSC_4359

Add hot lentils and vegetables to dressing; toss until well coated. Divide greens among serving plates. Top with lentil mixture and goat cheese.

DSC_4367
I ate this warm for dinner. I took a leftover serving to work the next day and ate it cold for lunch–it works that way too! I mentioned the high protein content earlier, and the high fiber also makes it filling. Those facts were clear later in the afternoon, when I felt no need for a 2:30pm snack. HIGHLY unusual.

Happy Spring!
DSC_4366

Bready Goodness

I am very lucky to have a husband who likes to bake breads, pizzas, rolls, etc. I bought him some sourdough starter a couple of years ago, and ever since, as he has kept it alive with regular “feedings,” and remained fairly committed to using it often. Since we are a family of two, and we liked to vary our diets, this habit keeps our freezer well stocked with pre-made pizza dough, or leftover bread which I have sliced or cubed. (That is one thing he doesn’t do — put away the leftovers. After all the work he puts into the risings and the kneadings, once it comes out the oven, he would have it left out on the counter going stale for hours or days if it wasn’t for me! I suppose we make a good team.)

The reason I mention this is because I had some wheat sourdough bread cubes in the freezer that really needed to be used. Bread pudding is such a flexible recipe, someday perhaps one day I’ll even be able to make it up as I go along without reference. This time I found a recipe from the Tillamook County Creamery that matched up with ingredients I had on hand, plus some greens I had been craving. Perhaps my version will similarly inspire you, but you may feel confident enough to make it your own!
DSC_4319
Savory Bread Pudding
from Tillamook
Serves: 4 (Original recipe served 6-8, but I halved)

2 egg yolks
3 eggs
1 teaspoons kosher salt
1/4 teaspoon garlic powder
13 oz (~1.5 C) milk
8 oz (1 C) heavy cream
4 oz (1/2 C) plain greek yogurt
(crème fraiche, sour cream, or buttermilk are all great substitutions)

1/2 Tablespoon butter, to butter casserole dishes
10 oz stale bread cut into 1 inch cubes (some bread pudding recipes insist on weak white bread, but for this recipe you can use hearty bread like my wheat sourdough, whole wheat, French, Italian, or rye. If your bread doesn’t feel stale, dry it out in a hot 350°F oven on a sheet pan for 7 minutes)
5 oz cooked bacon (smoked turkey, ham, or sautéed mushrooms, for vegetarians, can be substituted. I ended up making two smaller dishes that incorporated the bacon and one that simply left it out for a vegetarian version)
1 teaspoon minced fresh sage (thyme, rosemary, or parsley can all be substituted)
3 oz caramelized onions*
4 oz kale, briefly sautéed in
olive oil, with
1/2 Tablespoon garlic
3/4 cups sharp cheddar cheese, shredded
1/2-1 teaspoon ground black pepper
DSC_4327
I highly recommend planning your schedule to make this recipe the day before you want to bake it. As you can see, you need to cook bacon, toast bread, and sauté greens before you can even assemble the dish to go in the oven. *Having a batch of caramelized onions done in advance will be helpful. Otherwise, you’ll be waiting way too long for dinner to be ready, like I was. I was starving by the time I was caramelizing the onions via two different shortcuts (they worked fine for the purposes of this recipe, but the onions were definitely more of a weird mushy texture I wouldn’t have wanted to use for anything else).
DSC_4320        DSC_4321

DSC_4324So I made extra kale with garlic and put it on sourdough pizza crust that had been sprinkled with olive oil and parmesan cheese and topped it off with some crumbles of goat cheese.
DSC_4329    DSC_4331

But I digress. Here are the instructions:

To make the egg mixture, whisk together egg yolks, whole eggs, salt and garlic powder until well blended. Add milk, cream, and yogurt and whisk until smooth. Set aside.
DSC_4323

Butter a casserole dish (at least 1.5 quart capacity) or multiple smaller baking dishes. Take half the bread and layer among the bottom of the dishes, then half of the bacon, half of the sage, half of the caramelized onions, half of the greens, and half of the cheese. Sprinkle with ~1/2 teaspoon black pepper. Repeat with remaining half of ingredients, sprinkling cheese and then remaining 1/4 teaspoon black pepper on last. Carefully pour custard over filled dishes, soaking evenly. You want all of the bread to be wet, so push down into custard if necessary.
DSC_4328
Cover dish and refrigerate at least one hour and preferably overnight. Uncover and bake in an oven pre-heated to 325°F for approximately 40-50 minutes, or until internal temperature reaches 157°F or until gently puffed and lightly browned. Allow to cool slightly, then scoop into bowls to serve; serve warm.

Pictures–especially ones taken with my cell phone camera because I am too hungry and excited the next day to get a real camera–don’t do this kind of comfort food justice. Eat up!
20130409_214353

Bottles Upon Casks Upon Jars

Last week, I decided it was about time that I found a way to use some of the specialty ingredients that have been sitting patiently in my refrigerator or pantry, expiring away.

It takes a sincere effort to use up an entire jar or bottle of these things, before they pass their date.  I lamented about this fact when my friend Kristen and I discovered expired and unusable Sriracha in my pantry once when cooking together in my kitchen.  I told her I liked having it on hand, but didn’t want to have a full bottle. She is an avid Sriracha eater, so she offered to transfer some of hers over to a small jar for me to have. How great is that? This kind of friendly/neighborly trade makes so much sense to me, and it harkens back to the idea of neighbors lending a cup of sugar.  Do neighbors even do that anymore? I have trouble imagining myself knocking on someone’s door to ask for some sugar, flour, sauce, etc., even in my safe and relatively comfortable suburban neighborhood. It would be interesting, though, if groups of people in a local vicinity “went in on” smaller quantities of goods.
DSC_4173
I won’t tell you how long past expired the sweet chili sauce was, but unlike the Sriracha, there was little difference in taste, and I searched through the web to find a recipe that could take advantage. Here’s what I settled on.

Spicy Shrimp with Thai Peanut Rice Noodles
Based on recipe found via the Food Network here
Servings: ~4

~6 ounces rice stick noodles
1/4 cup peanut butter
1 tablespoon lime juice
2 tablespoons sweet Thai chili sauce
(Trader Joe’s)
1 teaspoon spicy chili garlic paste
1 tablespoon fish sauce
1 tablespoon soy sauce
1/2 cup broth
,
plus extra as needed. Use whatever kind you have around–I had an open container of vegetable broth in the fridge, and I thought it worked fine.
1/3 teaspoon curry powder
1 teaspoon canola oil
2 -3 green onions
, chopped
1 tablespoon garlic
, chopped
1/2 pound frozen raw shrimp, peeled and deveined
, tail on,
thawed overnight in the fridge or if you need to cheat, carefully thaw in bag submerged in room temperature water, replacing the water as it cools.
Chopped peanuts
Lettuce

Optional Thai Sauce:
1/3 cup cold water
1/2 teaspoon sugar
2 tablespoons fish sauce
1 teaspoon vinega
r, white or rice
1/8 teaspoon sweet chili sauce
1 pinch crushed chili flakes
1 small carrot
, shredded

Prepare rice noodles according to package directions, placing in a bowl with hot water until soft. Noodles can be al dente since they will be added to the pan and simmered for a few minutes with the shrimp and sauce.

Melt peanut butter in a small microwave safe bowl for 15 seconds. Whisk in lime juice, sweet Thai chili sauce, chili-garlic sauce, fish sauce, soy sauce, broth and curry powder. This can be made ahead of time and re-whisked immediately before adding to noodles.

Make optional sauce ahead of time, if using. This sauce is for drizzling over the noodle bowls upon serving. I was skeptical, because it didn’t taste like much on its own, but it does add to the final taste product. Prepare sauce by combining the following in this order: cold water, sugar, fish sauce, vinegar, sweet chili sauce and crushed chili flakes. Grate carrot, add to bowl, and stir.

Heat oil in a large nonstick fry pan at medium-high heat. Add onions and let cook for about 30 seconds. Add garlic and sautee for about 1 minute. Add thawed shrimp to hot pan. Cook for about two minutes per side until just pink.
DSC_4175

Add drained rice noodles to the pan along with prepared peanut sauce. Cook for a few minute until all ingredients are heated through and rice noodles soften. If mixture seems dry, add 1/2 cup more broth to loosen up.

Place lettuce on serving dishes and top with rice noodles and shrimp. Drizzle with 1-2 Tablespoons of optional sauce. Top with fresh cilantro, if you have it, and chopped peanuts. Additional carrot can also be shredded on top.
DSC_4177

Enjoy! Try not to dwell on the fact that you haven’t made a noticeable dent in the various bottles and casks and jars…

Bake it into a cake

Last week, I kept seeing in the freezer a container of leftover canned pumpkin and thought, I better use that up.  Pumpkin is generally though to be a fall/winter ingredient, and we are heading straight into summer, based on the weather forecast.  I do wish that pumpkin recipes better matched up with the standard quantity in cans, because there is always some remaining!

As I said before, my first idea for using a leftover ingredient often involves baking a dessert.  Fortunately, this was going to be a welcome addition to my husband’s family’s Easter meal gathering the next day.

Pumpkin Roulade with Ginger Frosting

Adapted from Ina Garten’s Food Network Recipe

For the cake:
3/4 cup all-purpose flour
1/2 teaspoon baking powder
1/2 teaspoon baking soda
1 teaspoon ground cinnamon
1 teaspoon ground ginger
1/4 teaspoon ground nutmeg
1/2 teaspoon kosher salt

3 extra-large eggs, or 4 large eggs, at room temperature
1 cup granulated sugar
3/4 cup canned pumpkin
1/4 cup confectioners’ sugar

For the filling:
8 ounces cream cheese
scant 4 ounces plain yogurt (I used greek)
1 1/4 C confectioners’ sugar, sifted
~2 tablespoons milk
1/4 cup minced dried crystallized ginger
pinch of kosher salt

Preheat the oven to 375 degrees F. Grease a 13 by 18 by 1-inch sheet pan (also known as a jelly roll pan?). Line the pan with parchment paper, or in my case a silpat, and add grease and flour to that–it is very important so the cake doesn’t stick!

In a small bowl, whisk together the flour, baking powder, baking soda, cinnamon, ginger, nutmeg, and salt. Place the eggs and granulated sugar in the bowl of an electric mixer fitted with the paddle attachment and beat on medium-high until light yellow and thickened (this goes faster if your eggs have fully come up to room temperature). With the mixer on low, add the pumpkin, then slowly add the flour mixture, mixing just until incorporated. Finish mixing the batter by hand with a rubber spatula. Pour into the prepared pan and spread evenly. Bake for 10 to 12 minutes, until the top springs back when gently touched.

While the cake is baking, lay out a clean, thin cotton dish towel on a flat surface and sift the entire 1/4 cup of confectioners’ sugar evenly over it. (This is to prevent the cake from sticking to the towel). Remove the cake from the oven and immediately loosen it around the edges with a rubber spatula. Invert cake squarely onto the prepared towel. Peel away the parchment paper or silpat.
DSC_4182
Gently roll the warm cake and the towel together (without squeezing), starting at the short end of the cake. Allow to cool on a wire rack.

Meanwhile, make the filling. Ina’s recipe calls for 12 oz Italian marscapone cheese, 1 1/4 C confectioners sugar, and 2 tablespoons of heavy cream. My beloved Trader Joe’s was out of marscapone, so I followed a reviewers suggestion of using cream cheese. Since I only bought one package, I thought I needed to beef it up closer to 12 ounces. But there was plenty of frosting — I probably could have just used the cream cheese and reduced the sugar to 3/4 Cup. I also used the skim milk I had on hand rather than buying a container of heavy cream.

In the bowl of an electric mixer fitted with the paddle attachment, beat the cream cheese, confectioners’ sugar, and milk/cream together for about a minute, until light and fluffy. I added just enough to milk to reach the desired consistency. Stir in the crystallized ginger  and salt.

To assemble, carefully unroll the cake onto a board with the towel underneath. Spread the cake evenly with the filling.

DSC_4184

Reroll the cake in a spiral using the towel as a guide. Remove the towel and trim the ends to make a neat edge. Dust with confectioners’ sugar and serve sliced. (I refrigerated to preserve for the next day, and sliced immediately before serving.)

Ta-da! My first roulade:
DSC_4187

Healthy Choice

Remember the leeks from the broccoli soup recipe? Well, the store doesn’t sell leeks individually — you have to buy several — so I had some left over.  I also wanted to use fish in a meal I cooked one of these days.  As you may know, one of the those recommended habits for healthy eating is incorporating 2-3 servings of fish per week, to gain the benefits from healthy fats.  This meal was going to be shared with my husband for once, and while quite fit in general, Matt’s blood work has shown that he could improve his cholesterol levels.

I came across a recipe on the Food Network website by Ina Garden for “Salmon with Lentils.”  Subsequently, while searching for a particular recipe among my saved selections and reading through several, I discovered that leeks and salmon and leeks and lentils are common combinations. I am going to try to store this tidbit in my memory for future planning. This recipe also used–surprise surprise–more celery and carrots from my refrigerator stock.

Salmon with Lentils

adapted from Ina’s Barefoot in Paris

Serves 2 plus 1-2 servings of leftovers

Ingredients
6 ounces lentils (I had this much left of black beluga lentils I bought in a whim with a gift card to Williams Sonoma. These are great lentils though, if you can find them, and they work well in place of green lentils, which could also work here).
a few tablespoons of olive oil
1.75 cups chopped yellow onions
1.5 cups chopped leeks, white and light green parts only (Leeks can acquire a lot of dirt and grime during harvest. To prepare, cut to separate white and light green part from green leaves. Cut once lengthwise. Submerge in a bowl of cold water and slosh layers around. Drain and then arrange pieces together to chop crosswise).
3/4 teaspoon fresh thyme leaves
1.5 teaspoons kosher salt
1/2 teaspoon freshly ground black pepper
1 tablespoon minced fresh garlic
1 cup chopped celery
1 cup chopped carrots
1 cup homemade chicken stock, or good canned broth
1.5 tablespoons tomato paste (Hint: when you open a can of tomato paste, which rarely needs to be used in its entirety, measure individual tablespoon amounts into small pieces of plastic wrap or into ice cube trays and freeze.  Keep scoops together in a container for later use)
1.5 tablespoons red wine vinegar, or to taste
6-8 oz center-cut salmon fillets, in the quantity of the number of people you are serving (in my case, 2, wild-caught all the way)

DSC_4159
Place the lentils in a heat-proof bowl and cover with boiling water. Set aside for 15 minutes, then drain.

Heat oil in a medium-large saute pan.  Add the onions, leeks, thyme, salt, and pepper and cook over medium heat for 10 minutes, until the onions are translucent. 
DSC_4162
DSC_4164

Add the garlic and cook for 2 more minutes. Add the drained lentils, celery, carrots, chicken stock, and tomato paste. Cover and simmer over low heat for 20 minutes, until the lentils are tender. Add the vinegar and season to taste.

While the lentils are simmering, preheat the oven to 450 degrees F.

For the salmon, heat a cast-iron or other oven-proof saute pan over high heat for 4 minutes. Rub both sides of the salmon fillets with olive oil and season with salt and pepper.

DSC_4166

When the pan is very hot, place the salmon in the pan and cook over medium heat without moving them for 2 minutes, until very browned. Flip fillets, and move pan into preheated oven.  Cook 5-7 minutes, until the salmon is cooked rare and still moist. Scoop lentil-vegetable mixture on plates and place a salmon fillet on top.
DSC_4168

Enjoy your meal, and look forward to the dessert you can afford to have because you made a healthy choice for dinner! 🙂

It Started with a Chicken

Let me start off by saying that last week was a model week of non-waste.  And yes, I’m proud.

It helps that I chiseled out time to “cook” at least four times.  I shopped a couple times — once for two meats I used, and later in the week when I had to pick up milk anyway, I grabbed some additional vegetables. The rest of the ingredients came from leftover items or my “pantry stock.”  Carrots, celery, onions, and garlic – even for those of you who cook infrequently, I recommend keeping these around.  Maybe put some potatoes in this category too. They keep for a very long time (i.e. more than a month) and it is nice to not worry about them.

Monday
My friend Katie was coming over for dinner that night. In the morning, I put my ~6 pound roasting chicken, which was rubbed under the skin with a mixture of olive oil, rosemary, thyme, pepper, and salt, in the slow cooker, along with several whole cloves of garlic some some sliced onion.  The timer was set for 9 hours, and it stood on “keep warm” for about 2 hours, which probably deteriorated the texture of the meat a little bit. But it was still quite moist.

Two leftovers were featured in a side dish: smashed potatoes. I have been working through a ginormous bag of red potatoes I had bought for the Super Bowl, so I boiled some potatoes and added a little buttermilk, leftover from making Irish Soda Bread for St. Patrick’s Day, and many of the roasted onions and garlic from the slow cooker.  I also made some buttermilk biscuits and steamed broccoli florets for a healthy side.

Wednesday
First things first: I got started on Melissa Clark’s basic chicken stock recipe. I separated the meat from the skin and bones, which I tossed into a pot with the other ingredients. What a shame I didn’t have any leftover parsley stems again, having experienced the amazing flavor impact they can have when making a poached egg recipe.

While that simmered, I used some other leftover chicken broth to make dinner. Have you guessed yet what it could be?

Chicken Pot Pie
Adapted from a recipe by Cecilia Light, sous chef at Chicago’s Balsan restaurant, via Tasting Table again
Serving size: 4, divided according to your serving dish of choice

5 buttermilk biscuits – I used my leftovers from Monday; that recipe came from Cooking Light. You can customize the biscuits with cheddar or parmesan cheese too.
2 small carrots
1 large celery stalk
1/2 small yellow onion
2 small red potatoes
1 Tbs. extra-virgin olive oil
1.5 tsp. Kosher salt (plus more for blanching vegetables and seasoning)
~12 ounces of roasted leftover chicken, some dark and mostly white meat
1 small spring fresh thyme (the thyme in our outdoor garden survives all winter, if you can believe it)
1.5 Tbs. unsalted butter
3 Tbs. all-purpose flour
1.5 C cold chicken broth
Cheddar, gruyere, or parmesan cheese (optional)

Chop vegetables into 1/2 inch cubes. I did my best to replicate the picture! It was a fun exercise.

DSC_4138DSC_4141

But this is going to be in a pot pie, who really cares?

Make filling: Fill a medium saucepan with water and bring to a boil over high heat. Add kosher salt. Add vegetables and blanch one at a time until tender, approximately 2 minutes each, fishing them out each time with a slotted spoon and transferring them to a medium bowl. Blanch potato last – it may take 3-5 minutes – and drain through a colander. Set aside all vegetables in a bowl. Rinse out saucepan.

Set saucepan on medium heat. Melt butter.

Once the butter is melted, use a wooden spoon to stir in 3 tablespoons all-purpose flour.  Cook, stirring constantly, until the mixture somewhat dry and grainy, 1 to 2 minutes (be careful not to burn).

Stir in ½ cup cold chicken broth and stir like crazy. I ended up pulling out a whisk too.  Once the mixture is somewhat smooth, add more chicken broth, ½ cup at a time, until all of the chicken broth is used and the sauce is thick, about 5-7 minutes. Taste and adjust flavor, if needed, with more kosher salt (but keep in mind how salty your roast chicken is).

Stir in the cooked vegetables and chicken, torn into bite-sized chunks.

DSC_4142DSC_4145

Take half of your biscuits and break them into pieces to line the bottom of your baking dish(es). 

DSC_4148Cover them with your potpie filling. If using non-cheesy biscuits, add a little bit of shredded cheese on top of the filling. Place remaining biscuits on top of that.  DSC_4154

Place in the oven and bake until the filling is bubbling and the biscuits are warmed through, 12 to 15 minutes. Remove from the oven and serve.

DSC_4157

Thursday
Everyone has had leftover roasted poultry in a sandwich.  I upped the ante by using a panini press.  I had leftover sourdough bread in the freezer, spread with a mix of leftover gouda cheese and butter on one side and leftover quince paste (in place of fig jam that was recommended in once recipe I referenced) on the other.  Once heated through, I added baby arugula leaves that had been dressed with lemon juice.  This sandwich could be replicated with almost any cheese and any jam (or with leftover turkey, perhaps cranberry sauce and brie cheese?). Sans Griddler, you could use two frying pans, preferably cast iron, and turn the sandwich repeatedly.20130321_182641

Friday
This doesn’t fit in perfectly with the progression, but I will mention that I did cook (with help from my husband Matt!).  The selection was enchilada casserole, using the cheddar cheese I had on hand along with some hot sauce in place of the Monterey Jack cheese.

Sunday
It gets better! Remember Monday’s broccoli? I had kept the brocoli stems instead of tossing them right away, thinking I might find a good recipe for them, and lo and behold, Tasting Table came through with perfect timing with a creamy broccoli soup! I just had to buy leeks, and skip the dill. (The title of the email was “Florets and the Machine” – how great is that? I’m singing “Shake it Out” in my head now…)

If only I could be so productive every week!

Smoothie Satisfaction

DSC_4134

A few weeks ago, my husband and I had several house guests. I seem to recall a time in the past when these guests asked about orange juice in the mornings, and I didn’t have it, so halfway through the weekend I came home with a half gallon from Trader Joe’s. Alas, when the guests departed, hardly a glass had been consumed, and I faced an abundance of juice that I rarely drink and Matt never does.

Over the course of a couple of weeks, I used the orange juice to make Orange MuffinsCinnamon-Orange Juice Cake (a delicious coffee accompaniment that resembled a doughnut in cake form) a marinade/sauce for pork chops, and the recipe I am featuring today, for an Avocado Banana Smoothie. All of these recipes would certainly have tasted better with freshly squeezed orange juice and orange zest incorporated, but I was content to “cook” almost exclusively from what I had on hand.

I just realized that my mantra should probably be: “when in doubt, bake it into a cake or blend it into a smoothie,” because I have previously used excess produce to make things like beet cake and avocado pound cake.

I actually selected this recipe because I had a very ripe avocado I needed to use, which I had bought because it was on sale and for no other reason–not a good idea, but I seriously have work to do in terms of controlling myself at grocery stores. It was a coincidence that I also bought a brand new blender this week and wanted to it work its magic. Never mind that I later verified the sharpness of the blending blade by slicing the top of my finger while trying to put the pieces away. (Boy is it sharp!)

Back to the food. This recipe was adapted from a recipe from Martha Stewart’s Everyday Food and influenced by Marcus Samuelsson’s recipe for an Avocado Banana smoothie.

Avocado Banana Smoothie
Serving Size: One jumbo-sized smoothie or two regular glasses

1/2 avocado
1/2 banana (can be one that has been kept in the freezer, waiting to find a home in a smoothie)
1/4 cup non-fat plain Greek yogurt
3/4 cup of orange juice (preferably freshly squeezed)
juice from 1/2 lime, or to taste (I had about 2 tablespoons)
1 teaspoon freshly grated ginger, or to taste (I keep ginger in the freezer for as long as a month to take out and grate from as needed, and it is very easy and neater to grate ginger from frozen)
2 teaspoons of honey, or to taste
1 1/2 cups of ice

Drop solid ingredients into a blender and then pour liquids on top. Blend until smooth. Serve immediately. In honor of St. Patrick’s Day, enjoy this liquid green goodness!

Herbilicious

Last week, I took on the challenge of poaching eggs thanks to inspiration from a Tasting Table recipe found here. My previous attempts have not been impressive–I tend to lose a lot of the egg white. However, I liked the sound of this recipe and had most ingredients on hand. (To be fair, I substituted quinoa for bulgur and panko for breadcrumbs. I also left out curry leaves and ended up leaving my chile behind at the checkout of the grocery store. It was so tiny I didn’t even see it roll down the belt! I substituted a little green chile hot sauce I had in my pantry as a souvenir gift from Mexico from my sister-in-law. It still turned out great.) As for the poaching, well, check out the photo on the recipe page — my egg actually looked a lot like that!)
The item I did buy was parsley, for the parsley stems that flavored the poaching water.
Using up fresh herbs is tough. I ended up having both cilantro and parsley on hand, which fortunately triggered the memory of a chimichurri sauce and one of my favorite and easiest Cooking Light recipes.
20130308_203812

Argentine Black Bean Pizza with Chimichurri Drizzle

Adapted from Cooking Light and myrecipes.com

1 of your favorite store-bought pizza doughs, or dough from your favorite pizza dough recipe

1 red bell pepper, or previously roasted red peppers in jar if you have

Black Bean Spread (recipe uses only a portion of this):
1/2 cup coarsely chopped onion
1 (15-ounce) can 50%-less-sodium black beans, rinsed and drained
1 (14.5-ounce) can organic fire-roasted diced tomatoes with green
chiles, undrained (such as Muir Glen), or whatever chunky tomato product you have on hand plus something to add heat.  During the summer, I grew a jalapeño plant next to my tomatoes, so I did once attempt to duplicate this with fresh ingredients. The depth added with the fire-roasted version is nice though.

Preheat the oven to 450°, preferably with pizza stone inside.

If you are roasting a fresh pepper, cut in half lengthwise; discard seeds and membranes. Place pepper halves, skin sides up, on a foil-lined baking sheet; flatten with hand. Turn oven to broil and set timer for 10 minutes. Watch pepper closely until blackened (I say “watch closely” because in my house, broiling=smoke detecter goes off, even if I swear there’s no smoke or fire!). Place in a zip-top plastic bag; seal. Let stand 10 minutes. Peel and cut into 16 strips. Set aside.

Combine ingredients for Black Bean Spread in blender or food processor and process until smooth.

Roll dough into the size and shape of your pizza stone or baking dish and to desired thinness. Place dough in 450° oven to pre-bake for approximately 7 minutes.  Remove from oven. Spread Black Bean Spread thickly over dough. Sprinkle with:

1-2 ounces finely grated fresh Parmesan cheese, enough to cover Black Bean Spread in a thin layer.

Return to oven and bake for 10 minutes or until cheese is bubbly.

20130308_203536

Chimichurri:
1/4 cup chopped fresh parsley
1/4 cup chopped fresh cilantro
2 tablespoons olive oil
1 tablespoon fresh lemon juice (I’m going to go out on a limb here and say you could substitute lime juice!)
2 teaspoons minced garlic

Combine chimichurri ingredients in a small bowl.  When pizza is done and cooled slightly, drizzle mixture over.  Cut into pieces and garnish each slice with strips of red bell pepper.

20130308_203646
Then, with remaining herb leftovers, I took advice I found online for freezing cubes in olive oil.  I also read some people using chicken broth or water.  The oil combination makes sense to me though, since I have already been freezing batches of fresh basil pesto for years. This was just whole leaves. What also makes this great is that olive oil and herbs are the start for another chimichurrri!

Any ideas for the leftover Black Bean Spread, besides eating it with tortilla chips?

Bumper Crop – Part 2

One way I used up a ton of tomatoes (and a ton of time) was making ketchup. I used the recipe in my New York Times Cookbook — and found the result nearly inedible.  I don’t feel the need to track the recipe down now, but let me be clear about the problem: any time a ketchup recipe instructs you to add cloves, add no more than 1/4 what it says, and by no means add a full tablespoon!

I was in serious danger of committing serious waste.  How did I use it up?  Added lots of tomato paste, and used it in meatloaf.

DSC_2218 DSC_2222

There was a New York Times recipe that served me well: Tomato Eclairs.  This was probably one of the most unique ways I used tomatoes, and boy was it fun! They didn’t come out terribly beautiful, which may be why I can’t track down any photos. But what a great brunch item! I even had leftover ricotta that I made fresh earlier in the week.

One thing I want to note that may seem obvious is that these are really only good fresh.  Like many pastries, the eclair loses texture and flavor with the refrigeration required to keep these safely for any length of time. I planned poorly and was the only one there to eat the fresh eclairs. Next summer, I will make them again for witnesses!