Swiss Chard and Corn Frittata

This is one of those “clean out your fridge” recipes, inspired by the fact it was Wednesday, the day before I would pick up a new load of produce from my farm share. I don’t manage my kitchen quite as precisely as a restaurant kitchen manager, but each week, as Wednesday approaches, I am watching to make sure the fullness of the vegetable drawer is getting lower, and that we don’t make anything that generates an abundance of leftovers. I want to be excited by the CSA pickup, not overwhelmed! 

I was thrilled to be served, once again, by New York Times Cooking, with an appropriate recipe- Savory Clafoutis With Corn and Swiss Chard. (I sensed some controversy in the comments about using “clafoutis” so I’ll just call it a frittata). It called for my beautiful swiss chard and excess parsley and used the leftovers from canned corn I had for my son’s Raddish Kids box recipe. I even remembered to thaw and incorporate a whole egg I had previously frozen, after it cracked unexpectedly as I was moving things around in the fridge to get ready to go away for a weekend. I was confident to make a number of other substitutions–leftover yellow onion slices plus shallots took the place of leeks, fennel fronds replaced dill, Greek yogurt replaced  crème fraîche–and the rest matched what I usually have on hand.

Cooks often turn to eggs to bring together extra vegetables in a recipe, and I found myself doing the same. Quiches, frittatas, omelettes, etc. are all very forgiving. (As Sam Sifton said in the day’s New York Times Cooking newsletter, “You’re a better cook than you think.”) In fact, I wondered if I should make a point to establish weekly menu planning that includes an egg dish. I constantly read and think about how themed weekly meals simplify meal planning. Our family has talked about “Taco Tuesday” and “French Fries Friday.” “Eggy Wednesday?” That won’t do, gotta have alliteration. “Whisking Wednesday” it is. 

I set aside extra time this Wednesday to do additional ingredient prep for this veggie burgers recipe-which shared the ingredients of onions, garlic, and parsley–in addition to the swiss chard stems, I took care of thyme and beets while I was chopping away. It felt good to whiz through the dinner-making process the following day. I also enjoyed the leftover frittata as an early lunch snack. Happy cooking! 

Corn and Swiss Chard Frittata
Adapted from New York Times Cooking

Ingredients:3/4 Cup whole milk
3/4 Cup plain Greek yogurt
4 large eggs
2 ½ Tablespoons all-purpose flour
2 Tablespoons fresh parsley
, chopped
2 Tablespoons dill or fennel fronds, chopped
3/4 teaspoon kosher salt, to taste
1/2 teaspoon freshly ground black pepper, to taste
1 Cup Cheddar (about 4 ounces) cheese, coarsely grated
2 Tablespoons extra-virgin olive oil
~1 Cup of thinly sliced onion or allium— 2-3 shallots, 2-3 small leeks, yellow onion, or a combination
2 Cups corn kernels
1 large garlic clove, grated on a Microplane or minced
1 large bunch Swiss chard, stems removed, leaves coarsely chopped
1/4 Cup Parmigiano-Reggiano, grated

For serving:
Fresh lemon juice
Red pepper flakes

1. Preheat oven to 375 degrees. Start your all your mise en place, slicing the onion first, so you can get the sauteeing underway while you do the rest of the chopping, mincing, grating and measuring.

This approach works if you’re the type of person who can multitask. If you’re not, wait until everything is measured before cranking up the stove!

2. Take a large (at least 9-inches) oven-safe skillet and add olive oil; heat over medium heat. Add onion mixture and sauté until soft and starting to brown slightly (about 10 minutes). 

3. While keeping an eye on the onions, take a large bowl and whisk together eggs, milk, Greek yogurt, four, parsley, fennel fronts, 1/2 teaspoon salt and 1/2 teaspoon pepper. Once smooth, incorporate 3/4 Cup of the shredded cheddar. 

4. When the onions are cooked, mix in corn, garlic and a pinch of salt; cook until the corn is softened and warmed and the garlic releases its pleasant aroma. 

5. Start adding chard leaves, a bunch at a time, and stir them in until wilted. If you’re like me, you will definitely start to get nervous about fitting all of the ingredients in the pan. You will question whether you should have used a pan with higher sides. You’ll survive! (Especially if you opt for the wider plan like I did). Use a lid between adding batches of chard leaves to speed up the wilting. 

6. Add 1/4 teaspoon of salt and some black pepper grinds to the pan. Pour your liquid mixture over the corn and chard, then sprinkle over the remaining cheddar and the Parmigiano. Move skillet to oven.

Bake until custard is just set, and slightly brown on top–keep checking, as early as 20 minutes. It took less than 25 minutes for the mixture to set in my wider pan.


Slice and serve with a squeeze of fresh lemon juice and a small pinch of red pepper flakes.

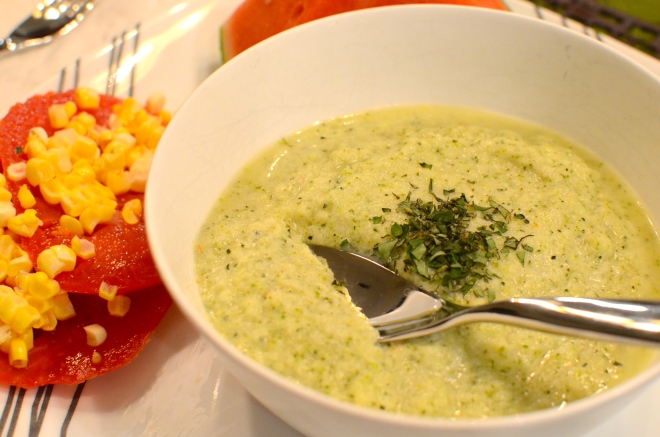
Summer Soups – Roasted Corn and Chilled Zucchini

Wasn’t August delightful? For those of us with access to fresh vegetables like corn, zucchini, tomatoes, peppers and more, this late summer time feels special.

New recipes, of course, can take some time to explore. And of course, the past few weeks of August were a bit packed for me. Let’s just say there were a fair number of tomato sandwiches. When I did some cooking prep for the first time in awhile, I was so rusty I even sliced my finger while chopping onions!

I was faced with the reality that if I wanted to do my work, complete my final class assignment with any degree of quality, fulfill other obligations, AND prepare myself healthy meals, they were going to have to be fairly simple. The corn soup I made with leftover roasted corn? Not so simple. The chilled zucchini soup I made the following week was more reasonable. Though you might guess which was more delicious in this case. I’ll describe both here, in case they appeal to you.
DSC_3372
DSC_3341

Starting with the zucchini soup: the recipe has wonderfully few ingredients, all of which I could get my hands on at home. I had almost forgotten about the garden zucchini in my fridge, which I acquired in a trade with my mom; she snagged some of my own garden tomatoes.

Chilled Zuchinni Soup
Adapted from the James Beard Foundation’s Isabela Wojcik

2 large zucchini
2 Tablespoons olive oil
1 small onion
, sliced thinly
1 teaspoon fresh oregano, minced and divided
scant 1/4 teaspoon red chili pepper flakes
1 Cup stock
, chicken or vegetable
Salt and freshly ground black pepper to taste
1/2 Cup plain greek yogurt
(or other dairy such as sour cream or milk)

DSC_3353
Mise en place! Prep onion and oregano. To prepare the zucchini, trim, split in half lengthwise and thinly slice into half-moons.
DSC_3356
While slicing the zucchini, a couple of things dawned on me: my food processor could probably do this even faster, and the slices would be great for ratatouille. Next time.
DSC_3358
In a medium sauce or sauté pan, heat the olive oil over medium. Add the sliced onion, half of the oregano (about 1/2 teaspoon), and red pepper flakes.

Careful with the red pepper flakes.

Careful with the red pepper flakes.


Cook until the onion softens and becomes translucent.
DSC_3363
Drop in the zucchini and cook through for several minutes, on lower heat. As soon as it starts to look dry, pour in the the stock.
DSC_3365
Let the mixture cook until the zucchini is tender and the stock is boiling. Add salt and pepper to taste.

Take off the stove and transfer to a blender or food processor. Purée.
DSC_3366
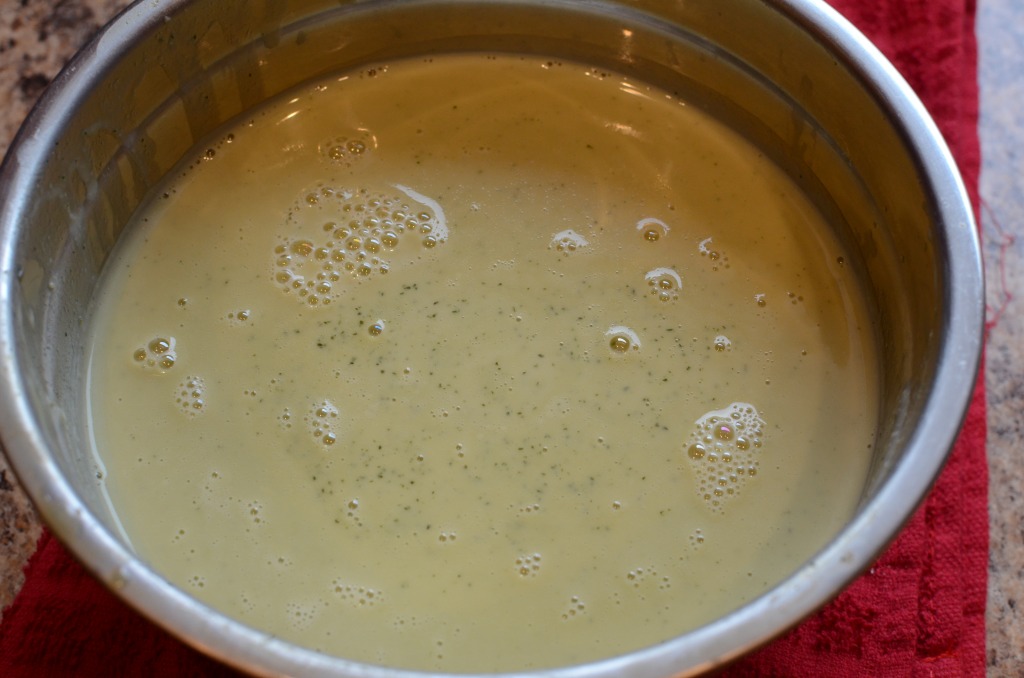
Add yogurt and blend. Taste and add more salt.
DSC_3367
Chill, and then serve with other seasonal foods and a hunk of bread. You could also eat it warm. I won’t judge.
DSC_3370
DSC_3374

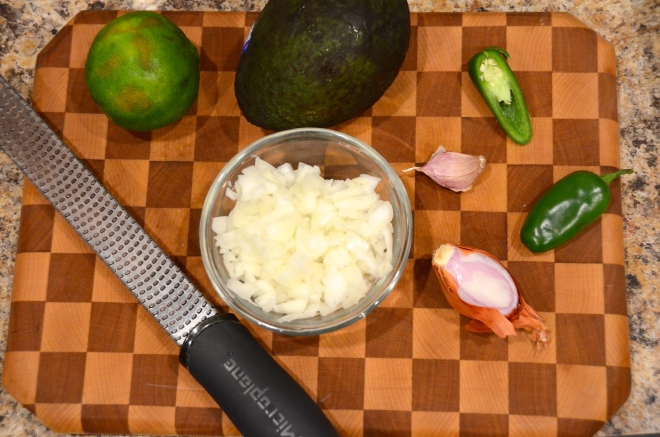
Roasted Corn Soup with Guacamole and Bacon
Adapted from Epicurious, Lourdes Castro

Soup
3 Cups of corn kernels, I used 2 Cups from 3 ears of leftover roasted corn and 1 Cup frozen, divided
1.5 Cups chicken or vegetable broth
1/2 to 1 Cup water
, as needed, for extra liquid
2 Tablespoons olive oil
1 garlic clove
, minced
1/2 onion, chopped
1 jalapeno, stemmed and chopped
Salt and pepper to taste

Topping
1 slice of bacon, cooked until crisp (separate)
1/2 Cup roasted corn kernels (from above)
1/2 jalapeno, stemmed, seeded and chopped
1/2 avocado
1 Tablespoon shallot or red onion
, minced
zest and juice from 1/2 lime
Cilantro, if you have it!

DSC_3275
If using whole corn, remove kernels from cob.
This is one of those recipes that uses the leftover corn cob to infuse a soup with more corn flavor. Everybody’s doing it! The corn itself was leftover from a picnic, and I removed the kernels for the soup. So while prepping other ingredients, get your corn cobs simmering low in your broth plus some extra water.

This is how I keep broth on hand!

This is how I keep broth on hand!


DSC_3283
If using fresh corn, roast at least half of it in the oven at 450°F, on a lined baking sheet. Reserve some of the roasted corn for the topping, and put the rest in a blender.
DSC_3261
Cook the bacon and prepare the avocado, onion, pepper, and lime for the remaining topping.
DSC_3295
In a saucepan, heat the olive oil and add the garlic, onion, and jalapeno.
DSC_3296
Season with salt and pepper, cook until soft, at least 5 minutes.
Transfer to a blender with the corn.
DSC_3305
Pulse to combine.
DSC_3306
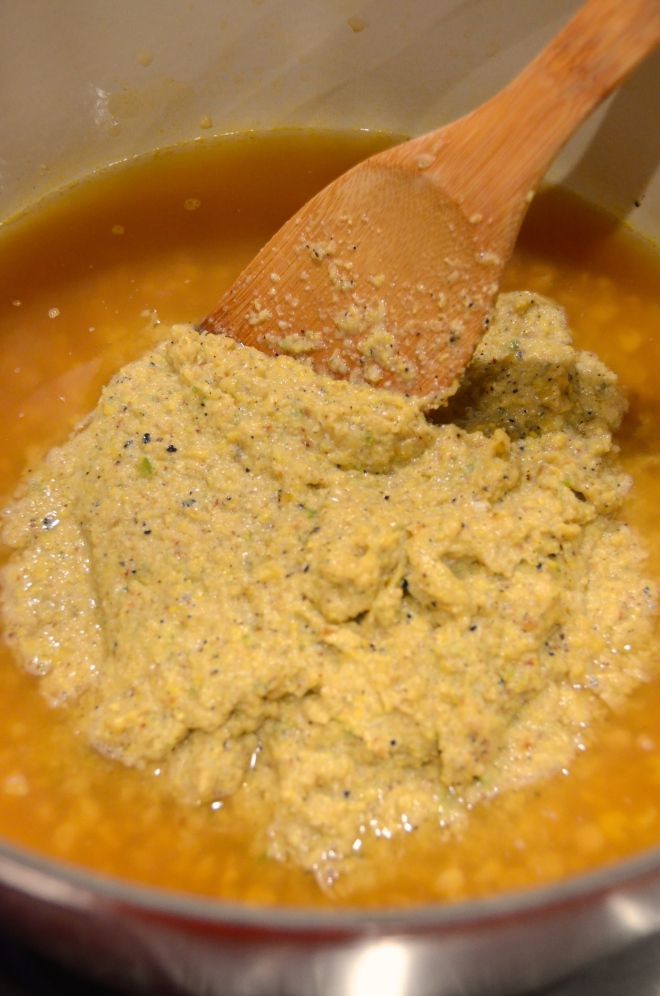
Remove the cobs from the stock and if possible, squeeze any liquid out of them. Transfer the corn mixture into the liquid and combine.
DSC_3307
Bring up the temperature to a boil while stirring frequently, and then lower heat. Simmer for about 10 minutes. You may need to add additional water at this point. Don’t worry–the flavor’s still there.

Ladle into bowls, garnish, and serve!
DSC_3317
DSC_3321

See how dark it is? This took awhile to make.

See how dark it is? This took so long to make.

Tastes of Summer – Watermelon and Ice Cream

I bought a whole watermelon the other day. I needed it to make a delicious heirloom tomato watermelon gazpacho recipe I planned to bring to a potluck.

I was surprised that I could actually make such a delicious gazpacho!

I was surprised that I could actually make such a delicious gazpacho!

I tasted the recipe after it was demoed by Chef Harold Deiterle, who recently released a cookbook, Harold Dieterle’s Kitchen Notebook Techniques. It won me over.

But mostly I wanted the watermelon for snacking. Fresh watermelon is one of those distinctly summer foods, a flavor I associate with backyard spitting contests of my childhood. The heat and humidity of summer bring on a kind of thirst that only watermelon can truly quench.

There are a few other flavors I lately connect to summer–even if I may in fact indulge all year long. Iced tea, ice-cold beer, and ice cream.

On the day I had about a quarter of my watermelon left, I heard someone mention watermelon rind as one of those trimmings that you’re going to be stuck composting, since there’s not much you can do to make it edible, sellable, and appealing. Not that I disagree. But I took it as a challenge. I was going to make watermelon rind pickles.
DSC_3161
Watermelon Rind Pickles
Adapted from Food.com for 1/4 watermelon
About 2.5 lb watermelon rind (flesh mostly removed, shell included)
For the brining:
1⁄4 Cup salt
1 quart water

For the pickling syrup:
2 Cups white vinegar
2 Cups water
4 Cups sugar
1/3 lemon
, sliced thin
Spices:
1 cinnamon sticks
1/3 teaspoon whole cloves
1/3 teaspoon whole allspice

DSC_3163
Remove all the juicy watermelon flesh and reserve for another use. (Admittedly, I will miss having the rind as a handle when I eat the remains later. Oh well.)

At this point, I had 2 lb 8.5 ounces.
DSC_3165
Next you will need to peel the outer hard rind from the softer white portion. It took a fair amount of muscle power and time to remove the green shell. I used a combination of peeler and knife. Your knife should be very sharp for this, and it’s important to be very careful. Cut away from yourself and always keep hands and fingers behind the direction you are cutting!
DSC_3170
After 5 minutes of labor, the green parts were gone. The next step is to remove any remaining pink, and slice into 1 to 2 inch by 3/4″ pieces. This took about 7 minutes.
DSC_3171
Final weigh in? 1 pound 8.6 ounces of rind. So 1 pound was still going to the compost, but if I had planned to use the whole watermelon’s rind (which would make more pickles than I would know what to do with), I would have saved more than 5 pounds.
DSC_3172
Make a brine by dissolving 1/4 cup of salt into 1 quart of water.
DSC_3174
I could have used less for this rind, and you may need to scale up for more.
DSC_3175
Allow to brine in refrigerator overnight.

Drain and rinse soaked watermelon rind.

At this point, I used the scale of 0.375 to approximate the other ingredients: allspice, cloves, cinnamon, and lemon. I could have scaled down a little less on the sugar, water, and vinegar that made up the syrup; in the end it would have helped to have more for inside the jars.
DSC_3181
If you’d like, combine the spices together in a cheesecloth.

Combine the syrup and spice ingredients and bring to a boil for about 5 minutes.
DSC_3191
Add half of the rind and simmer until it becomes translucent. It took about 36 minutes for my first batch.
DSC_3193
DSC_3206
Spoon rind out of the pan and into a clean jar. Be sure to sterilize, if you plan on preserving longer term.
DSC_3207
Repeat the simmering step with remaining rind.

Remove spice satchel and discard. Pour boiling syrup to cover the rind in jars. Why not include the lemon?
DSC_3209
Taste test results: Not bad. The cloves were a little more noticeable than I would like (I’ve complained about this before). Otherwise, the flavor resembled those Vlasic sweet and crunchy pickles, which were once the only type I could tolerate.
DSC_3213
Looking for other ideas for the watermelon flesh? Real Simple posted this yesterday:

onethread design via Real Simple

onethread design via Real Simple

Returning to the topic of ice cream….this same week, I thought I better make some before National Ice Cream month ends!

Ice cream (or sorbet) is another dish that can incorporate whatever you have around. Even cucumber. This time, I’m went to the herbs in my garden, and incorporated them into a rich base made with egg yolks.

Is tomato ice cream in my future?

Is tomato ice cream in my future?


DSC_3130
DSC_3196
Mint Ice Cream
Adapted from Melissa Clark’s New York Times recipe

1 Cup mint leaves
⅔ Cup sugar

1.5 Cups heavy cream
1.5 Cups milk
(I used my skim)
⅛ teaspoon sea salt, finely ground
6 large egg yolks

DSC_3137
Combine mint leaves and sugar in a food processor. Grind together until fully combined and green.
DSC_3183
DSC_3189
Pour cream, milk, sugar mixture and salt into a small saucepan and cook until the sugar dissolves. Whisk yolks in a separate heat-proof bowl.

When the sugar has dissolved, remove pan from heat and slowly whisk in about a third of the hot mixture into the yolks.
DSC_3199
Then pour the yolk mixture back into the pan and whisk with the remaining hot cream.
DSC_3200
Place pan back on a medium-low burner and cook slowly, thickening at about 170 degrees Fahrenheit.
DSC_3202
Turn off heat and allow mint to steep in the mixture for about 30 minutes.
Pour through a sieve to catch any solids.
DSC_3203
Cool mixture to room temperature and then chill in refrigerator for at least 4 hours.
DSC_3210
Follow the directions for your ice cream machine and churn away.
DSC_3211
After 20 minutes in this frozen-bowl style, you’ll have soft-serve.
DSC_3215
Transfer to a freezer container to harden.
DSC_3217
Happy summer!
DSC_3223

Swiss Chard and Prosciutto over Polenta

I’m due for a follow up on the last post, Chard Stem Hummus! What did I make with the de-stemmed leaves? Something unbelievably easy. Swiss Chard and Prosciutto over Polenta.
DSC_9298
You probably already know that the chard leaves lend themselves to a wide range of recipes. The leaves show up in recipes calling for some tomato here, a few dried fruits and nuts there, a touch of vinegar, or perhaps a little cheese. Last week I enjoyed Chard, Caramelized Onion, and Gruyère Crepes; also easy and delicious. I recently finished skimming through the expansive the book Vegetable Literacy, by Deborah Madison. Deborah lists the following as good companions for chard:DSC_9290

  • olive oil, butter, sesame oil
  • quinoa, rice, potatoes, white beans, lentils, chickpeas, pasta
  • garlic, thyme, cilantro, basil, cumin, saffron, nutmeg
  • fresh lemon, aged red wine vinegars
  • eggs, cream, Gruyère, Parmesan cheese, tahini
  • My selected recipe is spot on with several of the recommendations. As for eggs, I’m not one of those people who thinks to reach for eggs as a dinner ingredient (besides in crepe and other batters or dough). However, in this recipe I can easily imagine the soft polenta replaced with soft scrambled eggs, served with some rustic toast on the side.

    Swiss Chard and Prosciutto over Polenta
    Adapted from Cooking Light on myrecipes.com
    Scaled to serve 2

    IngredientsDSC_9287
    a few slices prosciutto or pancetta
    , about 1 ounce, cut or torn into 1/4-inch pieces
    Cooking spray
    1 Tablespoon garlic
    , minced
    3/4 Cup low-sodium chicken broth
    1/2 Tablespoon fresh thyme
    , chopped
    4 Cups Swiss chard leaves, coarsely chopped
    1/8 teaspoon sea salt
    1/8 teaspoon black pepper
    1 Cup prepared polenta
    , cooked from yellow cornmeal by following this recipe (scale down by at least half if feeding only 2 people) or freshly made instant polenta cooked according to package directions
    1/8 cup (.5 ounce) Parmesan cheese, shaved

    Head a large skillet over medium heat and spray with cooking spray or olive oil. Cook prosciutto about 10 minutes, until crisped. Removed the crispy pieces from pan and set aside.

    I love the flavor added with this step, but it sure makes a mess of the stovetop!

    I love the flavor added with this step, but it sure makes a mess of the stovetop!


    Add garlic and stir into the drippings in the pan for about 30 seconds. Pour in broth and add thyme. Raise the stove temperature to bring the mixture to a boil. Allow to boil for about 5 minutes to reduce by half.

    Add chard, salt, and pepper. Toss to incorporate.
    DSC_9296
    Cover the pan. Lower the heat to a simmer and cook until chard is tender, about 3 minutes.

    Spoon over polenta and top with prosciutto and Parmesan shavings.
    DSC_9300
    DSC_9304

    Chard Stem Hummus

    DSC_9260
    I made a cooked vegetable dish this weekend that I fully intended to share on the blog. It displayed a medley of farm-sourced ingredients and required quite a bit of time to stir and cook. When it finally finished, I sat down and ate it…and didn’t like the flavor. One of the vegetables I incorporated was kohlrabi, and I think it was too dominant in the dish. More importantly, the vegetables were supposed to soften after pan frying for so long, and the kohlrabi didn’t. It stood out. It may have even been burnt–I couldn’t tell. The dish was edible, but it needed a lot of tweaking before sharing. Fortunately, it wasn’t served to guests–only to my husband, who years ago would have run away if I tried serving him a dish with kohlrabi. He didn’t love it either, but he ate it. I’m so proud of how far he has come.

    It got me thinking about the people, young and old, who won’t eat vegetables, and their noble partners who, out of concern for the health and well-being of loved ones, find ways of sneaking in nutrition. Do you know one of those people? Maybe YOU are a sneaker. You probably use up even more of the vegetables you buy than I do, because you plan to throw them into a food processor to make a secret sauce, or soup, or dressing. In my ongoing search for recipes that use the Swiss chard stems, I found this recipe for a chickpea, tahini, and yogurt dip with hidden Swiss chard stalks. Last summer I pickled some stems, which was great for preserving, but I rarely reached for them in the fridge. When I tried this grilled Swiss chard stem recipe, I didn’t seem to have enough stems to make it substantial…and then some of them even blew off of the grill while they were being cooked! When tasting the hummus recipe I made this Monday, one would never guess it has Swiss chard. What a difference from that weekend vegetable medley! Are there those with the opposite view of a stealthy vegetable cook, who insist that each vegetable be featured prominently and celebrated, who are less than impressed with this approach? Perhaps. But this dip is undeniably delicious, and I do give the Swiss chard stems some of the credit.

    DSC_9285
    Chard Stem Hummus
    From Martha Rose Shulman of The New York Times

    4-5 ounces pound Swiss chard stalks, from about 1/2 pound bunch, sliced
    Salt to taste
    2 garlic cloves
    (to taste), peeled
    heaping 3/4 Cup cooked chickpeas (about half a small can), drained and rinsed
    2.5 Tablespoons stirred sesame tahini
    4 Tablespoons plain Greek yogurt
    2 Tablespoons freshly squeezed lemon juice
    , to taste
    1/4 teaspoon cumin seeds, lightly toasted on the stovetop
    1 Tablespoon extra-virgin olive oil

    Steam chard stalks over 1 inch water until tender when pierced with a fork, 15 to 20 minutes.
    DSC_9265
    Collect the rest of your ingredients.
    DSC_9272
    Drain the Swiss chard stems well, about 10 minutes. Add to a food processor along with your chickpeas.
    DSC_9274
    Purée, stopping the machine from time to time to scrape down the sides.

    DSC_9269
    Using a mortar and pestle, mash garlic with 1/2 teaspoon salt until you have a smooth paste. Add to chard stalks and chickpeas. Process until smooth.

    After the first whirring...

    After the first whirring…


    Wipe out the same mortar to grind your toasted cumin seeds.

    Add to processor along with tahini and yogurt and run the machine until smooth once again.

    With machine running, add lemon juice, olive oil and a touch of salt to taste. Test the dip for seasoning, and then transfer to a bowl.

    The final product!

    The final product!


    Sprinkle with chopped fresh parsley, for garnish, and serve with crudités, along with some wonderful homemade whole wheat pitas.
    DSC_9281
    Stay tuned for what I made with the leaves this time!
    DSC_9280

    Spice-Roasted Salmon with Green Beans and Rice

    The whole spring-forward-daylight-savings-thing is a killer. In spite of the fact I tried to go to bed early last Saturday night, I was dragging every morning thereafter. My distaste was only slightly dampened by noticing sunlight later in the evenings. If only there was a way to experience the thrill of extra daylight without losing sleep. Can’t the clock switch from 4:00 to 5:00 pm on a Monday?

    I really didn’t feel like cooking when I got home from the gym last Tuesday evening. I was tempted to make my dinner out of a mishmash of snacks and cheese; maybe I’d go as far as to open some boxed pasta or a can of beans. The fact that I had fresh fish in the refrigerator, waiting to be cooked, meant I needed to overcome these impulses.

    I’m glad I sucked it up. It doesn’t take long to put together a fresh, complete weeknight meal like this, getting in my omega 3s and vitamins. Green beans and salmon cook quickly (especially with subjective measures of done-ness, so you can be even quicker if you want) and rice is hands off. I only had to chop 3 small things and measure a couple of others. Easy breezy!

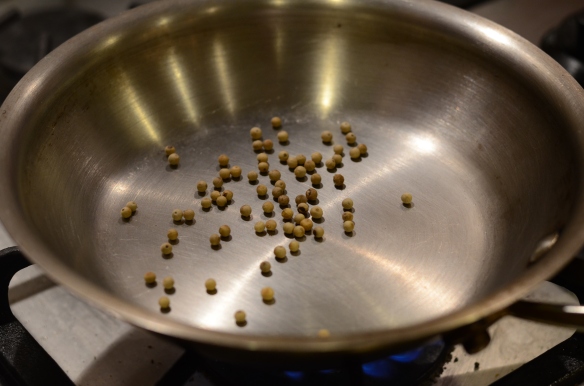
    The spice seasoning for the fish is garam masala. I have been making garam masala by toasting fresh whole spices at home, and one of the last times I made it, I made a pretty large batch.
    DSC_6741
    While we’re on the topic of spices, I have a reason to mention my spice cabinet organization.
    DSC_6734
    As you can imagine, it can be hard to keep track of a dozen little by-the-ounce plastic baggies of spices. Occasionally I relocate them to other empty spice containers, but they take less space in the bag. I found stackable plastic flat containers at the Container Store which have 6 shallow compartments. I can arrange several spices front to back in the compartments. Then I label the front with dry erase marker with each item in order. This way, I can see what I have with a quick glance, and I’m maximizing the space.
    DSC_6730

    What’s my organizational scheme for the rest of the spices? Well, you know how it is with your own kitchen. I just have a feel for where to find certain ones, particular ones that are used together in the same recipes. This is one of the reasons it is so utterly challenging to cook in someone else’s kitchen, isn’t it? (At least, the majority of someones who don’t alphabetize their spices.)

    Back to the cooking! A note on timing and temperature: the steps to this meal include boiling some basmati rice, blanching the green beans, sautéing the green beans, and pan-roasting the fish. My husband will tell you, I have a “thing” about my food being served at the proper temperature (and I pay close attention to this at restaurants). That usually takes the form of me wanting hot food to be served noticeably hot. You’re going to want to eat your salmon freshly cooked, so it should be the last thing you finish, obviously. I wanted to minimize dirty dishes, so, while the rice was cooking, I blanched the green beans and then sautéed them first in the same pan I planned to use for the salmon. While the salmon was finishing up later, I gave the beans a quick reheat in the emptied blanching pot.

    Then everything got cold as I was taking pictures, of course. No one ever mentions that!

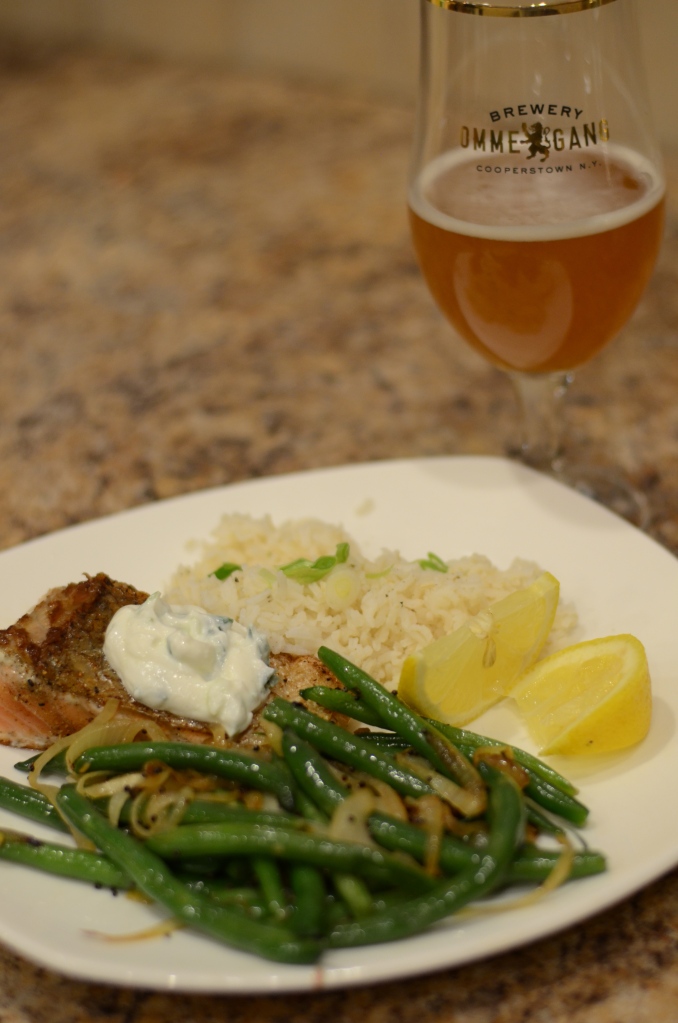
    Spice-Roasted Salmon with Yogurt Sauce
    For 2
    Adapted from Cooking Light

    1 1/2 tablespoons olive oil, divided
    2 sustainable salmon fillets, 6 ounces each
    1/2 teaspoon garam masala
    1/4 teaspoon kosher salt,
    divided
    about 4 Tablespoons plain Greek yogurt, 2% preferred
    1 Tablespoons green onions
    , thinly sliced, plus extra to garnish rice
    1/2 teaspoon fresh lime juice
    1 lemon
    , cut into wedges

    Heat a large skillet over medium-high heat. Add 2 teaspoons oil to pan; swirl to coat.

    Sprinkle fillets evenly with garam masala and 1/2 teaspoon salt. Add fillets to pan, skin side down. Cook about 7 minutes; turn over, and cook 1-2 minutes or until desired degree of done-ness and temperature.
    DSC_6745
    DSC_6746
    While the salmon is cooking, combine ingredients for the sauce. Whisk 2 1/2 teaspoons oil, 1/8 teaspoon salt, yogurt, green onions, and lime juice in a small bowl.

    The original recipe called for a combination of creme fraiche or sour cream and yogurt for the sauce. I only had Greek yogurt, which is my go-to substitute for creme fraiche and sour cream anyway, so I used the yogurt alone. It still tasted great to me.

    Dollop mixture onto fillets, when serving, along with lemon wedges on the side.


    Indian-spiced Green Beans

    From Martha Stewart Living

    1 teaspoon kosher salt
    , plus more for seasoning
    1 pound string green beans, stem ends trimmed
    2 teaspoons vegetable oil
    1 teaspoon brown mustard seeds
    1/2 large or 1 small yellow onion (about 4 ounces
    ), thinly sliced into rounds or half-moons
    2 teaspoons fresh ginger, minced

    DSC_6727

    Remember, you can keep your fresh ginger in the freezer to make it last so much longer!

    Remember, you can keep your fresh ginger in the freezer to make it last so much longer!


    Bring a pot of water to a boil. Fill a large bowl with ice and water. Once water is boiling, add 1 teaspoon salt and string beans.
    DSC_6725
    Cook about 3 minutes (the beans should turn bright green), and drain into a colander. Transfer to ice bath and slosh the beans around. Drain again.

    Set the large skillet over high heat, and add vegetable oil. When hot, add mustard seeds, and cook about 30 seconds, until seeds start to pop.
    DSC_6736
    Add onion, and cook, stirring until they begin to brown, 3 to 4 minutes. Add ginger, and cook 1 minute more. Add reserved string beans, and cook, stirring until hot. Season with salt to taste.
    DSC_6738

    Dinner is served! I realized later that my salmon was incorrectly placed here with the skin side up.

    Dinner is served! I realized later that my salmon was incorrectly placed here with the skin side up.

    Mmm, that's better.

    Mmm, that’s better.

    Spaghetti Squash Pad Thai

    I have not cooked nearly enough squash this winter, and I love squash. Squash can be used to create some very interesting combinations. Dishes made with squash can be lower-calorie without feeling like spa food. You see, I have returned to the lighter side, once again.

    Spaghetti squash is particularly unique. Whoever opened a spaghetti squash up for the first time and cooked it must have been quite surprised by the noodle-like texture.

    I’m sure you all are familiar with spaghetti squash. It does share similarities with noodles (thin rice noodles or vermicelli maybe), but no one is going to get the two confused. The texture is much wetter, even with straining, but the flavor is pretty mild so that it can take on whatever you use for a sauce. I liked the idea of using squash as the noodle for a pad thai preparation. For the record, I looked it up and calling it Pad Thai is not a misnomer–according to Merriam Webster online the literal translation is “Thai stir-fried mixture.” It doesn’t have to have rice noodles to be called pad thai.

    In fact, pad thai can incorporate a variety of vegetables. You may see in the original recipe that it called for a red pepper, which I didn’t have, so I left that out. I think the key ingredients here are the bean sprouts, green onion, cilantro, lime, and egg. I love peanuts and enjoy them in pad thai, but I’m not sure they are even required. What do you think “makes” pad thai?

    Spaghetti Squash Pad Thai
    From A Couple Cooks
    Make 4 generous servings

    1 large spaghetti squash
    1 bunch green onions
    ½ Cup fresh cilantro
    , chopped
    3-4 small carrots, fewer if they are large
    4 cloves garlic
    2 whole eggs
    1.5 Cups bean sprouts, divided
    2 Tablespoons vegetable oil
    , preferably peanut
    3 Tablespoons sweet chili sauce
    3 Tablespoons soy sauce
    1 lime
    Sriracha to taste
    (I don’t suggest leaving it out!)
    ½ Cup roasted salted peanuts, chopped

    Preheat to 400°F. Cut the spaghetti squash in half carefully–you’ll need a large, sharp knife. Scrape out the seeds and guts. Drizzle olive oil over cut sides and season with kosher salt and freshly ground black pepper. Place the squash cut side down on a baking sheet and cook until tender and easily pierced with a knife, about 45 minutes.
    DSC_6635
    When the squash is done, scrape out the flesh of each half. Place the “noodles” in a colander to drain out some of the liquid for at least 10 minutes or as long as you are finishing other prep.
    DSC_6640
    Meanwhile, get lots of prep bowls ready to facilitate mise en place.
    Peel and shred carrots. Mince garlic. Thinly slice green onions and add to bowl with garlic, reserving about 1 green onion’s worth in a different bowl. Chop the cilantro and set aside in its own bowl, or combine with reserved green onions.
    DSC_6644
    In a small bowl, beat together two eggs.

    In another small bowl, mix together the sauce: 3 tablespoons sweet chili sauce, 3 tablespoons soy sauce, juice of ½ lime, a few squirts of sriracha.

    So many bowls.

    So many bowls.


    Next, heat 2 Tablespoons oil over medium high heat in a large skillet. Add the garlic and green onions and cook about 45 seconds, until fragrant. Pour in the eggs and scramble until almost cooked.
    DSC_6650
    Add the crunchy vegetables (carrots and 1 Cup of the bean sprouts in this case) and squash noodles. Add 3 pinches kosher salt and toss together. Add the sauce and stir to combine.
    DSC_6652
    Cook until the vegetables are heated through, about 5 minutes.

    Garnish with plenty of crushed peanuts, fresh bean sprouts, and chopped cilantro and green onion.
    DSC_6653

    It struck me as ironic that the week after a “Bacon Optional” post, I cooked something vegetarian and almost vegan, minus the eggs. I swear it wasn’t intentional!

    Also, I was very surprised to find my husband was interested in eating this. Have I not yet divulged his history of reluctance toward fruits and vegetables? Well, when I told him I was planning to make this vegetable-heavy dish for dinner later that night, I totally assumed he would opt to eat something else, but instead he said “I’ll eat that.”

    “Even the bean sprouts,” I asked? Yes, even the bean sprouts. But don’t ask him to eat an orange. Ugh.

    Small vegetable victories!

    Small vegetable victories!

    Bacon Optional

    I’ve been doing OK lately at cooking and documenting healthy recipes. It’s true, two of my featured recipes in January came from Cooking Light. Then we hit Super Bowl weekend.

    Along with Super Bowl weekend came the inspiration for a party menu theme: “wrapped or stuffed.” “Wrapped or stuffed” certainly leaves open the opportunity to use fruits and vegetables and grains, but one is much more likely to please certain crowds by using cheese and bread and…bacon. One of the dishes I served was cream cheese stuffed jalapenos with bacon topping (optional).
    IMG_0220
    These jalapenos were spicy, and a bit of work to clean out, so I ended up having a handful of extra ingredients this week. Somehow I came across a recipe for jalapeno corn fritters (yes, more fritters!) that could be made entirely with ingredients I had on hand. I don’t even remember what search terms I was using, or whether this was Pinterest, but I’d say I struck gold.

    Jalapeno Popper Corn Fritters
    From Closet Cooking

    1.5-2 Cups corn kernels, frozen is fine
    1/2 Cup flour
    1 egg
    scant 1/2 Cup cheddar cheese
    , grated
    1/4 Cup cream cheese, room temperature
    2 jalapeno peppers (to taste, and depending on size), diced
    2 slices bacon, cooked and crumbled (optional)
    1 teaspoon smoked paprika
    1 teaspoon coriander seed
    , toasted and ground
    2 green onions, sliced
    1 handful cilantro, chopped
    zest and juice of 1 lime
    2 Tablespoons vegetable oil, as needed

    DSC_6625
    Begin by toasting coriander seeds and then grinding in a spice grinder, clean coffee grinder, or with mortar and pestle.
    DSC_6627
    DSC_6628
    Prepare vegetables.

    Yes, those are gloves! I recommend them for using with hot peppers.

    Yes, those are gloves! I recommend avoiding direct skin contact with hot peppers.


    Mix all of the ingredients (corn, flour, egg, cheddar cheese, cream cheese, jalapenos, bacon-if using, paprika, coriander, green onion, cilantro and lime juice) in a bowl.
    DSC_6631
    Heat a little oil in a non-stick pan over medium heat. Form mixture into patties, about 1/4 Cup each. Cook until golden brown on both sides, about 2-4 minutes per side.
    DSC_6632
    You could serve these with a creamy, buttermilk-based dressing, or consume them as is, like me. The recipe author even used a jalapeno popper flavored dressing.
    These didn't even make it to the table before being consumed by my husband and me!

    These didn’t even make it to the table before being consumed by my husband and me!

    To add to the gorging, I also had some free bags of regular potato chips lying around and was thus inspired to make a potato chip cookie recipe I found on Smitten Kitchen. It may be the copious amount of butter, but they were extremely delicious. Now that the week is over, I’ll be cutting back on the cheese, butter, and bacon…I swear.
    photo
    photo_2

    New Ideas

    Many people may be ramping up their cooking as part of the new year, whether the reason is to be healthier, to reign in food spending, or, like me, to enjoy new cookbooks that were acquired as part of the holiday season.

    Matt’s cousin, an impressive cook and founder of Cooking with Kyler, along with his wife, gifted us with the Ottelenghi: The Cookbook. I had been meaning for a long time to borrow the much-talked-about Jerusalem cookbook from my library, so this was a nice treat to experience Yotam Ottolenghi and Sami Tamimi’s style of cooking.
    DSC_6544

    It seems to me that many of these restaurant-chef authored books incorporate more of those hard-to-find or very recipe-specific ingredients, a lot of homemade components, and frequent scratch-based instructions in their recipes (i.e. home pickling, stocks, and doughs). I have yet to fully commit myself to such an approach. I don’t strive for perfect authenticity. Especially when becoming introduced to a new cookbook, I gravitate toward the recipes that require minimal advance preparation.

    Ottolenghi and Tamimi start the book by listing some of their favorite ingredients, many of which I’m on board with but some that I won’t rush to acquire (rose water) or to which am not ready to commit (sumac). I love their #8 item, pomegranate. The first recipe I prepared from the book was a fennel salad with beautiful pomegranate seeds and lemon dressing (I left out the sumac that was listed) as part of a New Year’s Eve meal for two. I had a fennel bulb left over, so that drove my decision to make the below recipe.
    DSC_6530
    Fennel, Cherry Tomato, and Crumble Gratin
    Adapted from Ottolenghi: The Cookbook
    Scaled down to about 2 servings from the original 6-8

    Crumble ingredients:
    Makes about 10 ounces

    150 grams (a little over 1.5 Cups) all-purpose flour
    50 grams/1/4 Cup “superfine” sugar (I used regular sugar and whizzed it in the food processor)
    100 grams/6.5 Tablespoons cold unsalted butter, cut into small cubes

    If starting from a stick of butter, I recommend cutting it into the small cubes and then returning those cubes to the refrigerator or freezer to ensure they are very cold when added to your mixer or food processor.

    Put the flour, sugar, and butter in a bowl to mix with your hands, or in an electric stand mixer, or, like me, in a food processor to work into uniform read crumb consistency. Transfer to a container. You’ll use about 2/3 of it if making a smaller portion of the vegetables like below. The rest can be kept in the freezer for a later date.
    DSC_6537
    Gratin:
    9 ounce fennel bulb
    1 Tablespoon olive oil
    1 tsp thyme leaves
    , plus a few whole sprigs
    1 clove garlic
    , crushed
    1 tsp course salt
    1/4 tsp freshly ground black pepper
    1/3 Cup milk or cream
    (I used 2%)
    2/3 recipe of Crumble from above
    a little over 1 ounce/33 grams Parmesan cheese, freshly grated
    Approximately 1/2 Cup/150 grams (but this is really to taste) cherry tomatoes, preferably on the vine
    a sprinkling of flat-leaf parsley, chopped

    DSC_6532
    Preheat the oven to 400 degrees F.

    Trim along the top and the base of the fennel stalks. Cut the bulb in half lengthwise, and slice each half into pieces about 2/3 inch thick.
    DSC_6533
    Add to a large bowl with olive oil, thyme leaves, garlic, salt and pepper. Toss.
    DSC_6535
    Pour into an ovenproof dish and pour milk/cream over the mixture. Mix the Crumble and the Parmesan and sprinkle on top. Cover the dish with aluminum foil and bake for about 45 minutes.

    I forgot to add the milk until partway through the cooking time. Fortunately, it turned out OK!

    I forgot to add the milk until partway through the cooking time. Fortunately, it turned out OK!


    Remove the dish from the oven and remove the aluminum. Add the tomatoes on top, and scatter some thyme springs on top of that.
    How about an extra sprinkling of cheese for good measure?

    How about an extra sprinkling of cheese for good measure?


    Here’s another reason this recipe caught my attention, and how I was resourceful–these off-season tomatoes actually came from my garden. I think they were one of the the last batches picked from my plants back in November, and they didn’t look especially appealing to eat raw so I roasted them. Then I froze them because I wasn’t feeling the urge to eat them at the time. Since this recipe called for roasting as well, I was happy to use them.

    Return the dish to the oven and bake for another 15 minutes, approximately. You want to be able to poke through the fennel easily and ideally achieve a golden color. Allow the dish to rest out of the oven for a few minutes before sprinkling with parsley.

    I was able to pull a few last acceptable-looking leaves from this plant before I laid it to rest for good.

    I was able to pull the last acceptable-looking leaves from this plant before I laid it to rest for good.


    As usual, I forgot to add the parsley until after the photos.

    As usual, I forgot to add the parsley until after the photos.


    Now I want to eat these tomatoes! The sugar and butter in the Crumble make the dish fairly indulgent. I will have to see what the rest of that Crumble can do for other roasted vegetables, perhaps ones I don’t especially like.
    DSC_6557
    Here’s to trying even more new things in the new year!