Tomato Gazpacho

What’s one of the recipes you can make using the abundance of summer tomatoes? Gazpacho!

So let’s make gazpacho! Everybody’s doing it recently, including Cooking with Kyler, which is hosted by my husband’s cousin and his daughter. It’s appealing because it is simple, refreshing, and customizable.

As I’ve mentioned before, I’m not a huge fan of cold soups in general, but I’ve recently warmed to the idea of a good gazpacho (see what I did there?) Especially when you add crunchy toppings.

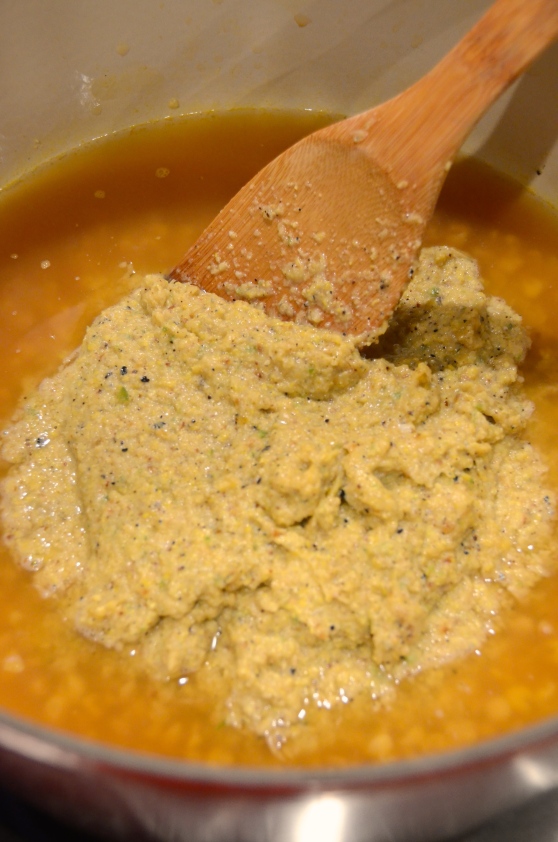
Gazpacho is simple because you can basically dump everything in a blender or food processor. However, it’s a bit messy – be forewarned. It’s likely you’ll have to transfer the mixture back and forth between different containers since it won’t completely fit in the blender. Then you strain it–unless you don’t mind a little texture. The resulting soup is a unique color (which will splatter all over your counters as part of the process) and fun to serve presented in clear drinking glasses.

I wish the 2 pounds of tomatoes made more of dent in my harvest. Here’s what I collect every couple of days!
dsc_4388

dsc_4416

Tomato and Cucumber Gazpacho

Adapted from Julia Moskin’s New York Times Cooking recipe

Approximately 2 lb ripe red tomatoes,

1 green pepper, such as bell pepper, Italian frying, or Anaheim pepper
1 cucumber, about 8 inches long
1 small onion (white or red)
1 garlic clove
2-4 teaspoons sherry vinegar
, to taste
Salt to taste
½ Cup extra-virgin olive oil
, plus more to taste and for drizzling

Optional and recommended toppings:
Hot sauce
Croutons-make your own with stale bread, butter, garlic and salt
Almonds, toasted and coarsely chopped
Avocado, cut into cubes

Prep your vegetables: seed and chop pepper, peel and chop cucumber and onion, and core and roughly chop tomatoes.
dsc_4372

The onion in not shown because I had a leftover portion of a red onion in the fridge that I ended up incorporating.
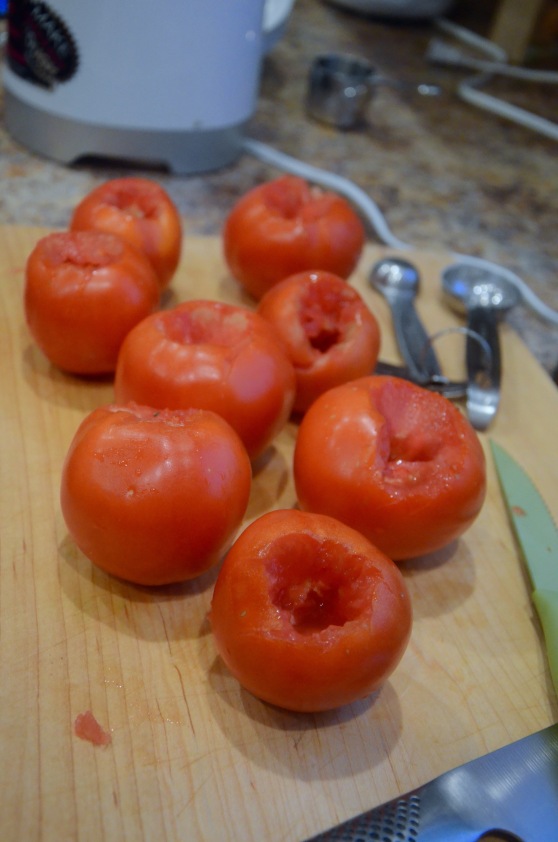
The onion in not shown because I had a leftover portion of a red onion in the fridge that I ended up incorporating.


dsc_4391

Combine as much of the tomatoes, pepper, cucumber, onion and garlic you can in a blender. It’s highly likely you’ll need to work in batches, so have a large bowl handy for transferring portions back and forth.
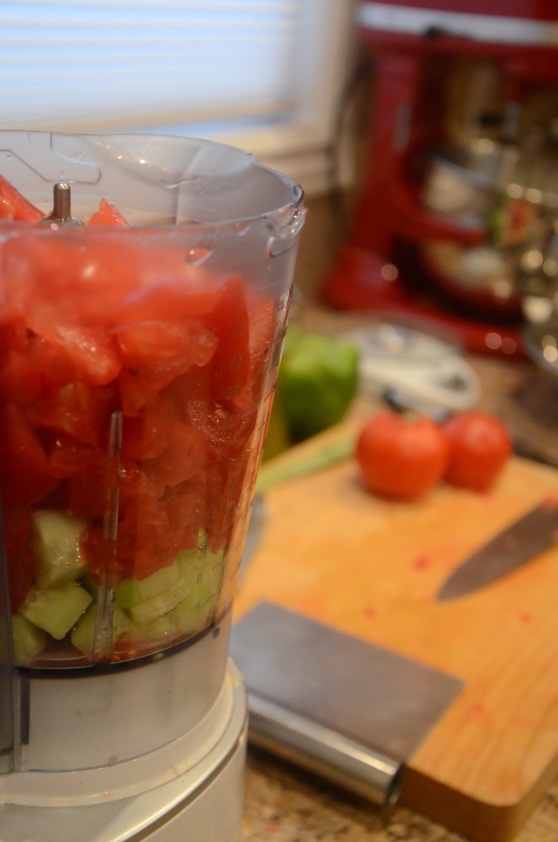
Initial batch: I made it through the cucumber and most of the tomatoes before I was at the top!

Initial batch: I made it through the cucumber and most of the tomatoes before I was at the top!


Ingredients batch 2.

Ingredients batch 2.

Blend at top speed until the mixture is very smooth. This may take a few minutes. A rubber spatula is great for scraping down the sides as needed.

Add the vinegar and 2 teaspoons of salt. If your appliance allows, do so while the motor is running.

You can add more vinegar later, but I will tell you now that 2 teaspoons was not enough for me!

Pour in the olive oil slowly. The smooth mixture will become an orange-pink color and look like a salad dressing. dsc_4403
Additional olive oil can make the texture more creamy if it is watery.

Press the mixture through a strainer or run through a food mill to extract all the liquids and discard the solids. I was less than enthused about the idea of discarding the nutritious solids, but using my food mill resulted in such minimal solids that I felt OK with sending it to compost.

It's one of the few times year this gets used!

It’s one of the few times year this gets used!


Transfer to a large pitcher, preferably glass, and refrigerate until very cold. This could be done overnight. In the meantime, prepare any toppings. I used some very old cubes of bread from the freezer, cooked in butter with garlic.
dsc_4406

When you are ready to serve, taste to adjust the seasonings with salt and vinegar. Serve in glasses. You can serve over ice or even chill the glasses for the best effect.
img_1326
Present with toppings: chopped almonds, garlic croutons, olive oil and Tabasco all worked great for me.
dsc_4417
dsc_4424

Why not enjoy outdoors?

Summer Soups – Roasted Corn and Chilled Zucchini

Wasn’t August delightful? For those of us with access to fresh vegetables like corn, zucchini, tomatoes, peppers and more, this late summer time feels special.

New recipes, of course, can take some time to explore. And of course, the past few weeks of August were a bit packed for me. Let’s just say there were a fair number of tomato sandwiches. When I did some cooking prep for the first time in awhile, I was so rusty I even sliced my finger while chopping onions!

I was faced with the reality that if I wanted to do my work, complete my final class assignment with any degree of quality, fulfill other obligations, AND prepare myself healthy meals, they were going to have to be fairly simple. The corn soup I made with leftover roasted corn? Not so simple. The chilled zucchini soup I made the following week was more reasonable. Though you might guess which was more delicious in this case. I’ll describe both here, in case they appeal to you.
DSC_3372
DSC_3341

Starting with the zucchini soup: the recipe has wonderfully few ingredients, all of which I could get my hands on at home. I had almost forgotten about the garden zucchini in my fridge, which I acquired in a trade with my mom; she snagged some of my own garden tomatoes.

Chilled Zuchinni Soup
Adapted from the James Beard Foundation’s Isabela Wojcik

2 large zucchini
2 Tablespoons olive oil
1 small onion
, sliced thinly
1 teaspoon fresh oregano, minced and divided
scant 1/4 teaspoon red chili pepper flakes
1 Cup stock
, chicken or vegetable
Salt and freshly ground black pepper to taste
1/2 Cup plain greek yogurt
(or other dairy such as sour cream or milk)

DSC_3353
Mise en place! Prep onion and oregano. To prepare the zucchini, trim, split in half lengthwise and thinly slice into half-moons.
DSC_3356
While slicing the zucchini, a couple of things dawned on me: my food processor could probably do this even faster, and the slices would be great for ratatouille. Next time.
DSC_3358
In a medium sauce or sauté pan, heat the olive oil over medium. Add the sliced onion, half of the oregano (about 1/2 teaspoon), and red pepper flakes.

Careful with the red pepper flakes.

Careful with the red pepper flakes.


Cook until the onion softens and becomes translucent.
DSC_3363
Drop in the zucchini and cook through for several minutes, on lower heat. As soon as it starts to look dry, pour in the the stock.
DSC_3365
Let the mixture cook until the zucchini is tender and the stock is boiling. Add salt and pepper to taste.

Take off the stove and transfer to a blender or food processor. Purée.
DSC_3366
Add yogurt and blend. Taste and add more salt.
DSC_3367
Chill, and then serve with other seasonal foods and a hunk of bread. You could also eat it warm. I won’t judge.
DSC_3370
DSC_3374

Roasted Corn Soup with Guacamole and Bacon
Adapted from Epicurious, Lourdes Castro

Soup
3 Cups of corn kernels, I used 2 Cups from 3 ears of leftover roasted corn and 1 Cup frozen, divided
1.5 Cups chicken or vegetable broth
1/2 to 1 Cup water
, as needed, for extra liquid
2 Tablespoons olive oil
1 garlic clove
, minced
1/2 onion, chopped
1 jalapeno, stemmed and chopped
Salt and pepper to taste

Topping
1 slice of bacon, cooked until crisp (separate)
1/2 Cup roasted corn kernels (from above)
1/2 jalapeno, stemmed, seeded and chopped
1/2 avocado
1 Tablespoon shallot or red onion
, minced
zest and juice from 1/2 lime
Cilantro, if you have it!

DSC_3275
If using whole corn, remove kernels from cob.
This is one of those recipes that uses the leftover corn cob to infuse a soup with more corn flavor. Everybody’s doing it! The corn itself was leftover from a picnic, and I removed the kernels for the soup. So while prepping other ingredients, get your corn cobs simmering low in your broth plus some extra water.

This is how I keep broth on hand!

This is how I keep broth on hand!


DSC_3283
If using fresh corn, roast at least half of it in the oven at 450°F, on a lined baking sheet. Reserve some of the roasted corn for the topping, and put the rest in a blender.
DSC_3261
Cook the bacon and prepare the avocado, onion, pepper, and lime for the remaining topping.
DSC_3295
In a saucepan, heat the olive oil and add the garlic, onion, and jalapeno.
DSC_3296
Season with salt and pepper, cook until soft, at least 5 minutes.
Transfer to a blender with the corn.
DSC_3305
Pulse to combine.
DSC_3306
Remove the cobs from the stock and if possible, squeeze any liquid out of them. Transfer the corn mixture into the liquid and combine.
DSC_3307
Bring up the temperature to a boil while stirring frequently, and then lower heat. Simmer for about 10 minutes. You may need to add additional water at this point. Don’t worry–the flavor’s still there.

Ladle into bowls, garnish, and serve!
DSC_3317
DSC_3321

See how dark it is? This took awhile to make.

See how dark it is? This took so long to make.

Tastes of Summer – Watermelon and Ice Cream

I bought a whole watermelon the other day. I needed it to make a delicious heirloom tomato watermelon gazpacho recipe I planned to bring to a potluck.

I was surprised that I could actually make such a delicious gazpacho!

I was surprised that I could actually make such a delicious gazpacho!

I tasted the recipe after it was demoed by Chef Harold Deiterle, who recently released a cookbook, Harold Dieterle’s Kitchen Notebook Techniques. It won me over.

But mostly I wanted the watermelon for snacking. Fresh watermelon is one of those distinctly summer foods, a flavor I associate with backyard spitting contests of my childhood. The heat and humidity of summer bring on a kind of thirst that only watermelon can truly quench.

There are a few other flavors I lately connect to summer–even if I may in fact indulge all year long. Iced tea, ice-cold beer, and ice cream.

On the day I had about a quarter of my watermelon left, I heard someone mention watermelon rind as one of those trimmings that you’re going to be stuck composting, since there’s not much you can do to make it edible, sellable, and appealing. Not that I disagree. But I took it as a challenge. I was going to make watermelon rind pickles.
DSC_3161
Watermelon Rind Pickles
Adapted from Food.com for 1/4 watermelon
About 2.5 lb watermelon rind (flesh mostly removed, shell included)
For the brining:
1⁄4 Cup salt
1 quart water

For the pickling syrup:
2 Cups white vinegar
2 Cups water
4 Cups sugar
1/3 lemon
, sliced thin
Spices:
1 cinnamon sticks
1/3 teaspoon whole cloves
1/3 teaspoon whole allspice

DSC_3163
Remove all the juicy watermelon flesh and reserve for another use. (Admittedly, I will miss having the rind as a handle when I eat the remains later. Oh well.)

At this point, I had 2 lb 8.5 ounces.
DSC_3165
Next you will need to peel the outer hard rind from the softer white portion. It took a fair amount of muscle power and time to remove the green shell. I used a combination of peeler and knife. Your knife should be very sharp for this, and it’s important to be very careful. Cut away from yourself and always keep hands and fingers behind the direction you are cutting!
DSC_3170
After 5 minutes of labor, the green parts were gone. The next step is to remove any remaining pink, and slice into 1 to 2 inch by 3/4″ pieces. This took about 7 minutes.
DSC_3171
Final weigh in? 1 pound 8.6 ounces of rind. So 1 pound was still going to the compost, but if I had planned to use the whole watermelon’s rind (which would make more pickles than I would know what to do with), I would have saved more than 5 pounds.
DSC_3172
Make a brine by dissolving 1/4 cup of salt into 1 quart of water.
DSC_3174
I could have used less for this rind, and you may need to scale up for more.
DSC_3175
Allow to brine in refrigerator overnight.

Drain and rinse soaked watermelon rind.

At this point, I used the scale of 0.375 to approximate the other ingredients: allspice, cloves, cinnamon, and lemon. I could have scaled down a little less on the sugar, water, and vinegar that made up the syrup; in the end it would have helped to have more for inside the jars.
DSC_3181
If you’d like, combine the spices together in a cheesecloth.

Combine the syrup and spice ingredients and bring to a boil for about 5 minutes.
DSC_3191
Add half of the rind and simmer until it becomes translucent. It took about 36 minutes for my first batch.
DSC_3193
DSC_3206
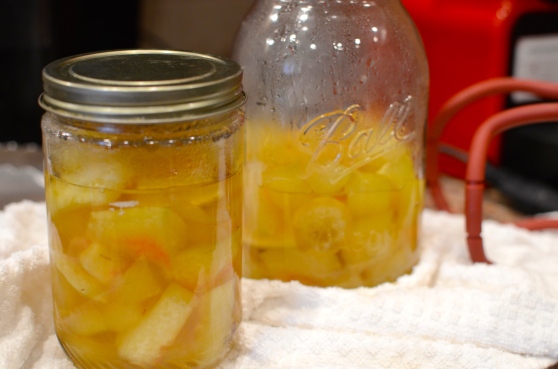
Spoon rind out of the pan and into a clean jar. Be sure to sterilize, if you plan on preserving longer term.
DSC_3207
Repeat the simmering step with remaining rind.

Remove spice satchel and discard. Pour boiling syrup to cover the rind in jars. Why not include the lemon?
DSC_3209
Taste test results: Not bad. The cloves were a little more noticeable than I would like (I’ve complained about this before). Otherwise, the flavor resembled those Vlasic sweet and crunchy pickles, which were once the only type I could tolerate.
DSC_3213
Looking for other ideas for the watermelon flesh? Real Simple posted this yesterday:

onethread design via Real Simple

onethread design via Real Simple

Returning to the topic of ice cream….this same week, I thought I better make some before National Ice Cream month ends!

Ice cream (or sorbet) is another dish that can incorporate whatever you have around. Even cucumber. This time, I’m went to the herbs in my garden, and incorporated them into a rich base made with egg yolks.

Is tomato ice cream in my future?

Is tomato ice cream in my future?


DSC_3130
DSC_3196
Mint Ice Cream
Adapted from Melissa Clark’s New York Times recipe

1 Cup mint leaves
⅔ Cup sugar

1.5 Cups heavy cream
1.5 Cups milk
(I used my skim)
⅛ teaspoon sea salt, finely ground
6 large egg yolks

DSC_3137
Combine mint leaves and sugar in a food processor. Grind together until fully combined and green.
DSC_3183
DSC_3189
Pour cream, milk, sugar mixture and salt into a small saucepan and cook until the sugar dissolves. Whisk yolks in a separate heat-proof bowl.

When the sugar has dissolved, remove pan from heat and slowly whisk in about a third of the hot mixture into the yolks.
DSC_3199
Then pour the yolk mixture back into the pan and whisk with the remaining hot cream.
DSC_3200
Place pan back on a medium-low burner and cook slowly, thickening at about 170 degrees Fahrenheit.
DSC_3202
Turn off heat and allow mint to steep in the mixture for about 30 minutes.
Pour through a sieve to catch any solids.
DSC_3203
Cool mixture to room temperature and then chill in refrigerator for at least 4 hours.
DSC_3210
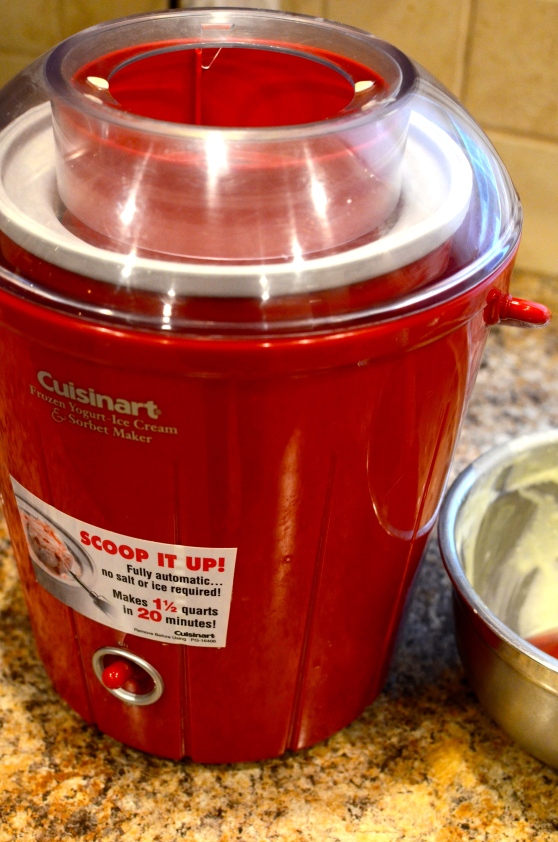
Follow the directions for your ice cream machine and churn away.
DSC_3211
After 20 minutes in this frozen-bowl style, you’ll have soft-serve.
DSC_3215
Transfer to a freezer container to harden.
DSC_3217
Happy summer!
DSC_3223

Peppermint Fudgesicles

I can enjoy ice cream year-round, no matter the weather. Judging by the number of ice cream shops and frozen yogurt places in my suburban area, I am in good company. Where I grew up, in a small town, the ice cream places were seasonal. It was a special treat to play tennis with my dad outside on the high school courts and then drive to an ice cream shop on the outskirts of town–the one that made the best sundaes. Other times of year, it was rare to find our home freezer devoid of Breyer’s natural vanilla ice cream.

Some frozen treats are more refreshing than others. When the heat and humidity of summer finally arrived this year, right as the calendar was switching to September, I had a very particular craving. I wanted something on a stick. There’s something about the iciness of popsicles, and the fact that one can literally wrap one’s mouth around them, that makes me feel cooler, amidst the stickiness. Many of the bloggers I follow started making popsicles regularly in the past year. They offer recipes with interesting ingredients like butterscotch, pink lemonade, and strawberry with coconut. But those didn’t quite fit the bill. I wanted a fudgesicle.
DSC_9622
Hence my decision to make them at home. I did use Smitten Kitchen’s 2011 recipe as a guide. I particularly appreciate her inclusion of ounces and grams, because I have that digital kitchen scale that helps make measurement easy and requires fewer utensils. Once I had all of my other ingredients set out and was reaching for the vanilla extract, I thought, why not add this peppermint extract for extra oomph?
DSC_9580
Another note: I have yet to add real popsicle molds to my kitchen collection. No worries: a mishmash of free shot glasses, like mine, work just fine. If you have those little disposable paper cups some people keep in bathrooms, they would work great.
DSC_9576

Peppermint Fudgesicles
Adapted from Smitten Kitchen’s Fudge Popsicles recipe

2 Tablespoons / 21 grams / 3/4 ounce semisweet chocolate, chopped or as chips or chunks
1/3 Cup / 67 grams / 2 1/3 ounce granulated sugar
1 Tablespoon / 7 grams / 1/4 ounce cornstarch
1 1/2 Tablespoons / 8 grams / 1/4 ounce unsweetened cocoa powder
1 Cup fat free milk
1/4 Cup heavy cream
Pinch of salt
1/2 teaspoon peppermint extract
1/2 Tablespoon / 7 grams / 1/4 ounce unsalted butter

Set a medium saucepan over very low heat. Add the chocolate and gently melt, stirring until smooth.
DSC_9583
Incorporate sugar, cornstarch, cocoa powder, milk and salt. Turn up the heat slightly and cook mixture until it thickens, stirring often. This will take no shorter than 5 minutes and could take 10. Remove saucepan from heat. Add butter and stir until melted. Add peppermint extract.
DSC_9586
Be careful not to over-pour…when the peppermint extract came out of the bottle and into my spoon a little too fast to capture, I feared I had ruined the whole batch (spoiler alert: I didn’t.)

Mix well. Allow to cool slightly, and then pour into shot glasses.

It's easier to transport the fudgesicles to and from the freezer if you corral them in a single container, like this Pyrex.

It’s easier to transport the fudgesicles to and from the freezer if you corral them in a single container, like this Pyrex.


DSC_9591

Now the popsicles need to be frozen slightly before the adding the sticks. If you try to stick them too early, the fudge mixture won’t support the stick enough to stay centered. On the other hand, you can’t let the popsicles freeze too much or you won’t be able to get the stick in, nor will the mixture adhere to the stick, for holding, once frozen. Deb from Smitten Kitchen said it would take 30 minutes for the mixture to freeze enough to add the sticks, but this will really depend on how much you let your mixture cool, or how cold your freezer is. After 30 minutes, my sticks were still flopping over. At this point, I had to go to bed, so I couldn’t wait. I made it work: with scotch tape, I supported the sticks so they would stay centered. Why not?
DSC_9595

The next night, the fudgesicles were fully frozen and ready to be enjoyed.

Remove them from the freezer, and dip the glass in a mug of warm water until the popsicle melts enough on the sides to pull out.
DSC_9620
DSC_9621

Mini fudgesicle!

Mini fudgesicle!


Now this is summer.

Green Tomato and Swiss Chard Gratin

The summer has been much cooler than previous summers, which has been refreshing. Lower energy bills are a perk, and subway and walking commutes are much less sticky. But the lower temperatures mean that my tomatoes have been pokey about ripening. I’m getting impatient! Chances are, as always, as soon as a couple of fruits start ripening, too many will, and I will be scrambling. Before that happens, I stole a few unripened tomatoes from the plant to make this dish.
DSC_9345
This is the first time I have tapped into the green tomatoes so early. There are usually some left over on the plant when the first frost creeps in, and I snatch them before my garden is winterized.

I make fried green tomatoes at least once every year. They keep me in touch with my southern roots. Buttermilk dressings and remoulade sauce make excellent pairings. In this recipe, lightly fried tomatoes make the topping of the gratin. It seems to me more like a crustless quiche of Swiss chard and Gruyère cheese with a green tomato topping.
DSC_9368
I hope you’re not getting sick of me posting about chard. Remember, you can substitute pretty much any hearty green..spinach, kale, collards, mustard greens, etc. I just happen to have chard again!
DSC_9325

Green Tomato and Swiss Chard Gratin
Reproduced from Martha Rose Shulman’s recipe in The New York Times

1 bunch Swiss chard, stems separated from the leaves
1 lb green tomatoes, sliced a little less than 1/2 inch thick
1/2-3/4 Cup cornmeal for dredging, as needed
Salt and freshly ground pepper to taste
3 Tablespoons olive oil
1 onion
, chopped
2 large garlic cloves, minced
2 teaspoons fresh thyme leaves, chopped
3 eggs, beaten
1/2 Cup milk
Approx 1/2 Cup or 2-3 ounces Gruyère cheese
, grated

DSC_9356
Prepare your 2-quart baking dish by spraying it with cooking spray or olive oil.

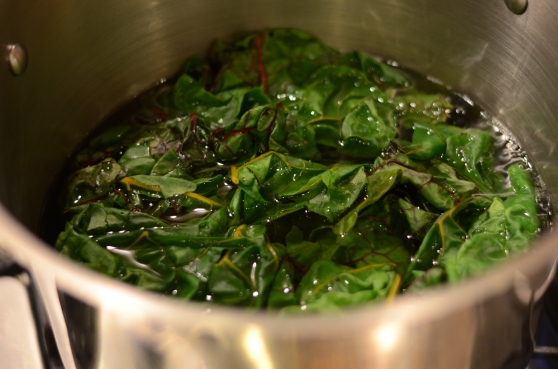
To blanch the swiss chard leaves, fill a large pot with salted water and bring to a boil. Fill a bowl with ice water. While the water heats, dice the swiss chard stems and set aside to be combined with the chopped onion.

Taste the rainbow.

Taste the rainbow.


DSC_9335

Once boiling, drop the chard leaves in the water and blanch for about 1 minute.
DSC_9337
Lift out of the water and transfer to the ice water to stop the cooking. Put the leaves in a colander to drain excess water. Chop and set aside.

Slice your green tomatoes. This is a little tedious with the plum tomatoes–ideally you have abundant round beefsteak or big boys. Season the slices with a little salt and pepper, and add a little salt and pepper to the cornmeal as well.
DSC_9346
Dredge the tomatoes in the cornmeal.
DSC_9348
Glug 2 Tablespoons of the olive oil in a heavy nonstick pan over medium-high heat. Pan-fry the tomatoes for about two minutes each side, until they are just starting to turn golden. A narrow flexible spatula, like the type used for fish, is helpful for turning over the slippery suckers. When done, transfer to a plate and set aside.
DSC_9350
While frying the tomatoes, preheat the oven to 375 degrees.

Add more olive oil to the now-empty pan and pour in the onion and chopped chard stems. Saute for about 5 minutes, until the vegetables soften. Add a pinch of salt, some grinds of pepper, and your minced garlic.
DSC_9354
Cook for about a minute, and then finally add the thyme and chopped chard. Stir everything together over medium heat for another minute. Good luck keeping it in the pan as your stir! Taste the mixture and add salt and pepper.

In a large bowl, whisk the 3 eggs with a generous pinch of salt and freshly ground pepper. Pour in the milk, stir, and then add the cheese and chard and stir. Pour into your baking dish.
DSC_9361
Layer the tomatoes over the top.
DSC_9362
Transfer to the oven and bake for 30 to 40 minutes. The gratin is done when the eggs are set and it is beginning to brown.

Could be browner.

Could be browner.


This makes a generous 6 servings, so I will be enjoying it all week!
Chow down!

Chow down!

Salted-Chocolate Rye Cookies

“You don’t post much about sweets, do you?”

I contemplated Matt’s question. He was digging into a ramekin of bittersweet chocolate mousse I had made, and I had just told him I didn’t make it for the blog. You see, I took no particular twist on the recipe, and the heavy cream and eggs I used for it had been bought specifically for the mint chocolate cookie ice cream I made the previous week. Mousse and ice cream aren’t the kinds of dishes you make to use up leftovers, usually. He was right, I could expand on the number of dessert recipes on the site.

I opted to make a dessert for the first of many upcoming summer potlucks. I saved a recent Tasting Table recipe for Salted-Chocolate Rye Cookies. It was adapted from a recipe in a cookbook out of the reputable Tartine Bakery & Cafe series. It looked rich and delicious. So many times when I tell people that the recipe I plan to make for an event or dinner is one I’ve never tried before, I get reactions of shock and horror. But this recipe calls for one pound of bittersweet chocolate. How bad can it be? I figure as long as I don’t burn the chocolate, the cookies will be enjoyed by most party guests.

The main draw of the recipe was that it calls for whole grain rye flour, an ingredient I was having trouble getting through after buying from a King Arthur Flour sale.

On a side note, I am such a King Arthur Flour super-fan. I frequently look for excuses to shop their website. I have gone out of my way driving through Vermont to stop at its bakery and storefront. If one of their recipes told me to climb a cliff to bake the muffins, I would seriously consider it. (Guess what, today they announced another sale! I swear they aren’t paying me to say this.)
DSC_9132

DSC_9173
Salted Chocolate-Rye Cookies
From Tasting Table

2⅔ Cups (1 pound) bittersweet chocolate (63-72% cacao), chopped or in chip form
4 Tablespoons unsalted butter
¾ Cup whole-grain rye flour
1 teaspoon baking powder
½ teaspoon fine salt
4 large eggs
, at room temperature
1½ Cups muscovado, natural cane sugar, or light brown sugar
1 Tablespoon vanilla extract
Sea salt
, preferably flaky, for topping

Prepare a small saucepan filled with about 1 inch of water and heat over medium to bring water to a simmer. Add chocolate and butter to a heatproof bowl that can hover over the simmering water without touching. Place bowl over the water and melt the chocolate and butter together.
DSC_9134
Stir occasionally with a heatproof spatula, taking care to check the bottom of the bowl. The chocolate and butter may take several minutes to melt.

Once melted, remove from the heat.
DSC_9151
DSC_9138
In a small bowl, add the rye flour, baking powder, and salt and whisk together.

In the bowl of a stand mixer, add the eggs.

There’s a little piece of advice cooks like to give about cracking eggs for baking: never crack the egg directly over your bowl of ingredients. Instead, crack eggs one at a time into a small bowl, and then pour from that bowl to the mixing bowl. This is to prevent you from getting shards of eggshell hopelessly buried in your dough or batter. When you are terrible at cracking eggs, like me, this is good advice. It’s advice I don’t always follow. This time, I made the right choice, and you can see why:
DSC_9143

I used organic natural cane sugar from my pantry.

I used organic natural cane sugar from my pantry.

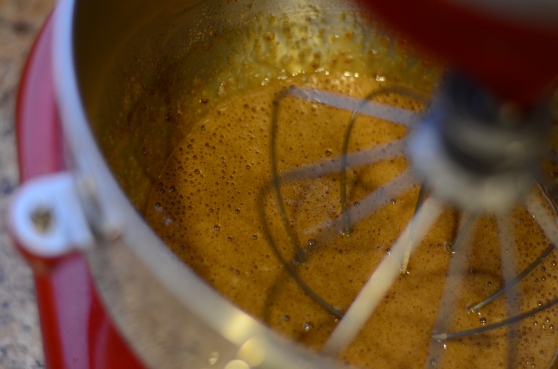
Using the whisk attachment on your stand mixer, begin to whip the eggs on medium high. Add the sugar gradually, and mix until incorporated. Turn up the mixer and whip until the eggs increased in volume nearly 3x (about 6 minutes).
Before whipping

Before whipping


After whipping

After whipping

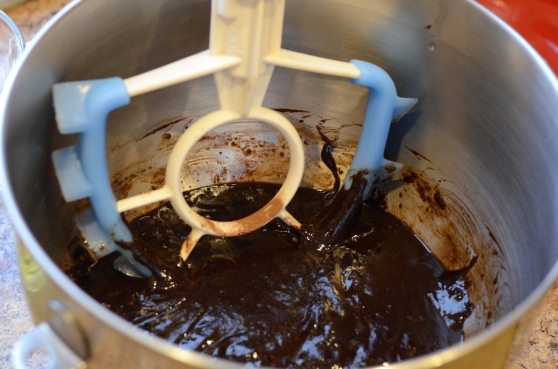
DSC_9154Lower the mixer speed and add the melted chocolate-butter mixture and the vanilla, stirring until fully combined. Add in the flour mixture and stir just until combined. A spatula attachment or manual stirring would be best at this point. The dough will be soft, almost like brownie batter.

Refrigerate dough until firm, at least 30 minutes. If you leave it in the fridge longer, it will have to warm up for a little bit before you can scoop it easily.

Heat the oven to 350 degrees. Line baking sheets with parchment paper or Silpats.
Take dough from fridge and scoop rounded tablespoons onto the baking sheets, spacing the balls about 2 inches apart.
DSC_9164
Top with a few flakes of sea salt.
DSC_9168

Bake for 8 to 12 minutes, until the cookies have completely puffed up. They should have a smooth bottom and rounded tops.

Almost there!

Almost there!


Remove the cookies from the oven and let cool slightly on the baking sheets. Transfer to a wire rack to cool completely. Enjoy within a few days.
Dense, fudgy, salty goodness.

Dense, fudgy, salty goodness.


DSC_9198
DSC_9189

Beet Carpaccio Salad with Goat Cheese, Proscuitto, and Candied Walnuts

Isn’t it ironic that the most delicious, comforting foods can look ugly in photographs. while cold, bland dishes appear stunning? (I checked to make sure that I am using the word “ironic” correctly, especially after watching Weird Al’s music video this week). We live in a world where it can’t be true that you ate good food unless you got a good picture. I can be reluctant to post certain recipes on this blog because they look unimpressive in my pictures.

I’m not going to dwell on these facts, because today I have a recipe for you that is delicious for the eyes and the mouth. Hooray!
DSC_9116
When you receive something as visually lively as red and white candy cane beets in your farm share, you have to show them off. If you have one red beet leftover from the previous week, even better! Throw in some salt, some sugar, and some fresh herbs, and some creamy and crunchy texture, and you have a delightful dish.

Beet Carpaccio Salad with Goat Cheese, Prosciutto, and Candied Walnuts
Inspired by this, this, and this

About 3 medium-large beets, of various colors – such as 1 red and 2 Chioggia
For the dressing:
1 Tablespoon of fresh basil
, chopped
1/2 teaspoon lemon zest
1 Tablespoon red onion
or shallot, minced
juice from 1 lemon
5 Tablespoons of extra virgin olive oil

To top it off:
about 2 ounces crumbled goat cheese
, to taste
about 2 teaspoons capers, to taste
1 piece of proscuitto, chopped into bite-sized pieces, to taste
about 3 Tablespoons candied walnuts, chopped (see below for instructions), to taste

You can roast the beets and glaze the walnuts for this recipe the day or even days before, which eases the pressure of completing it for dinner guests.

Burnt edges but still edible!

Burnt edges but still edible!

I thought I would take a shortcut and use a microwave method for combining the sugar and walnuts. Not a good idea–even at 2 minute intervals, they started burning and sticking before they were supposed to be done. As a result, I don’t advise following this recipe. Anyway, I used 1 Cup walnut halves and 1/3 Cup sugar plus 2 Tablespoons of water. Using these quantities and caramelizing on the stovetop with a little more water would probably be fine. Once they are coated in melted sugar, pour onto a sheet to cool. Transfer to an airtight container and use for any and all salads. Or snacking.

For roasting the beets, heat the oven to 350F. Trim the beets before roasting.
DSC_9098
Wrap in an aluminum foil packet with a little sprinkle of water. Place on a roasting pan and cook until tender when pierced with a fork (check at 45 minutes). Once done and cool, they should be easy to peel.

The chioggia beets remind me of a beautiful sunset...

The chioggia beets remind me of a beautiful sunset…

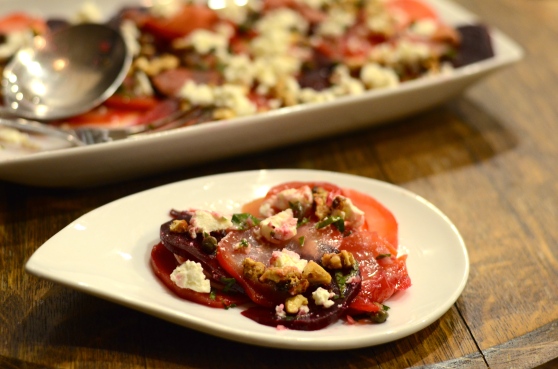
Slice the beets thinly and layer on a white dish, alternating colors.
DSC_9103

Prepare the dressing ingredients: lemon, basil, onion, and olive oil.
DSC_9108
You could add a pinch of sugar or a drop of honey if you want more sweetness.

Drizzle dressing evenly over the beets.
DSC_9114

Top with crumbled goat cheese, walnuts, prosciutto slices, and capers.
DSC_9115
The assembled salad keeps well and develops more flavor in the refrigerator.
DSC_9120
Because it looks so beautiful, you won’t hesitate to reach for any leftovers!

Sourdough Chocolate Cupcakes with Espresso Icing

Sometimes you need to make cupcakes simply because you have some cute paper baking cups.
DSC_8682
OK, you caught me, the red, white and blue paper cups were not the only reason I planned to bake for our Memorial Day party on Monday. Another reason is that the recipe puts the sourdough to use again! Plus, I had all the other ingredients on hand.

Memorial Day certainly lived up to its reputation as the unofficial start of summer. I could not have asked for a more perfect day to spend almost entirely outdoors. Right away, I started the sourdough part of the cupcake batter so it could sit for its allotted time, and then spent the entire morning finishing up weeding and planting my flowers, herbs, and tomato plants in the gardens around my yard. During the afternoon, Matt and I socialized on the deck with friends and family, serving these cupcakes for dessert after enjoying a delectable shrimp boil and a couple of grilled pizzas.

Shrimp boil with potatoes and corn and a few crab legs--why not?

Shrimp boil with potatoes and corn and a few crab legs–why not?

DSC_8664The cupcakes were irresistible to our crowd, even members of which have a fair amount of self control when it comes to sugar. You can certainly swap in a different icing without the coffee flavor if you are serving to children. Espresso powder (another pantry ingredient that hadn’t been getting much use lately) has the magical effect of intensifying chocolate flavor in baked goods, so I suggest leaving it in the cake portion, if you have it in the first place. And if you don’t have sourdough? Well, if you’re the type who loves baking, get on that. Or just use another favorite chocolate cake recipe.

Sourdough Chocolate Cupcakes with Espresso Icing
Adapted from King Arthur Flour to make cupcakes
Makes about 18 full-sized cupcakes

Cake Batter:
1 Cup sourdough starter
, fed and “rested”*
1 Cup milk , whole or 2% is better (I improvised with skim plus a little heavy cream)
2 Cups unbleached all-purpose flour
1 1/2 Cups granulated sugar

1 Cup vegetable oil
2 teaspoons vanilla
1 teaspoon salt
1 1/2 teaspoons baking soda
3/4 Cup unsweetened cocoa powder
1 teaspoon espresso powder
(optional)
2 large eggs

Espresso Icing: (this has been scaled down for cupcakes–you’ll need the original recipe’s quantity, or more, if making a layer cake)
2 teaspoons espresso powder or instant coffee dissolved in 2 teaspoons hot water
1/2 Cup (1 stick, 4 ounces) butter
~1/3 Cup plain Greek or regular yogurt
, or you can use buttermilk or sour cream
4 Cups powdered confectioners’ sugar

*This is where you have to plan ahead. The sourdough starter needs to be fed regularly anyway, so you could do the feeding the night before to have it ready for this recipe. Remember you may have to “feed” the starter again after taking out a Cup, depending on whether it is overflowing. The process we follow is to discard 1 Cup, add 1 Cup flour and 1/2 Cup water, stir, and let it sit out for 2-4 hours before returning to the fridge. I remembered late that the discarded cup can be used to start a new batch of sourdough, so I could have also fed that to make my batch for the cake.
DSC_8663

To make the cake:
In a medium-sized mixing bowl, combine the starter, milk, and flour. Let this mixture rest for 2 to 3 hours in a warm place. It may start to bubble a little bit, and should smell slightly sour in a pleasant way.
DSC_8672
In a second bowl, or the bowl of a stand mixer, beat together the sugar, oil, vanilla, salt, baking soda, cocoa, and espresso powder.

Add the eggs one at a time, beating well after each addition.

Add the sourdough mixture to the creamed mixture, combining gently until it all comes together.
DSC_8667
The King Arthur Flour recipe warns you that the batter starts out very “gloppy,” and I agree with that description! Eventually it smooths out.
DSC_8666
Preheat the oven to 350°F. Grease or spray your pans or muffin tins and then pour or scoop in the batter.
DSC_8668
Bake for about 25 minutes to start, and use a toothpick or cake tester inserted into the center to check that it comes out clean–that means it’s done.

Remove and allow to cool.
DSC_8669

To make the icing:

My espresso powder had hardened into chunks, which wouldn't break up easily, so after a minute or two, I simply removed the chunks from the liquid.

My espresso powder had hardened into chunks, which wouldn’t break up easily, so after a minute or two, I simply removed the chunks from the liquid.


Dissolve the espresso powder or instant coffee in the hot water, and set it aside. I suppose you could use 2-3 teaspoons of strong coffee in its place.

Melt the butter in a saucepan over low heat. While it melts, sift the confectioners’ sugar into a large bowl. To the butter, add the yogurt, buttermilk or sour cream and mix well. Keep an eye on the pan and bring just to a boil.

Pour the mixture into the bowl with the confectioners’ sugar along with the espresso/water. Beat slowly until any lumps are gone. The icing will be very thin and drippy, so it is best to let it cool and stiffen for a bit before spreading on the cupcakes.

Let's just say that the drops of icing disappeared by the end of our party.

Let’s just say that the drips of icing disappeared by the end of our party.


DSC_8677

Green Cake

St. Patrick’s Day was last Monday. I enjoy the holiday, but it’s not because I am one-eighth Irish (in fact, I have very little personal connection to my European roots). It’s because I love the color green! Green holds a very close second place position to my favorite color, cornelian red (Let’s Go Red!). Green and brown were my main wedding colors (see below). And we all can agree that green has a positive connotation, especially this time of year.
IMG_3370
When I came across a recipe for a naturally green cake, on a new site I’ve been following, I couldn’t resist. It used up parsley I had been working through, and made a dent in a leftover package of mint. These herbs are frequently called for in the Mediterranean dishes I’ve been craving. Specifically, the first part of the mint was used in mint and pistachio tabbouleh I served alongside Red Pepper and Lamb Pita sandwiches.
DSC_6783
I was very intrigued by the recipe. The cake has an added benefit of freshening one’s breath. You can’t say that about just any dessert or breakfast item, can you?
DSC_6794
I didn’t have enough of the herbs for a full-sized cake, so I scaled it down to 1/4 of the original recipe. It is fairly easy to do if you have a kitchen scale and you can figure out divisions in your head, or, like me, you have a nerdy husband (or calculator) nearby.

For those of you without a kitchen scale, I tried to closely translate the ratios into measuring cups and spoons.

If I needed another reason to try it out, I saw that this recipe was adapted from a recipe in the cookbook from Roberta’s, a well-known restaurant in Brooklyn. I’ve only visited the restaurant once so far, and I can report only positive things about the food.

Roberta’s Parsley Cake
Adapted from Food 52’s Adaptation and scaled down by 75% to fit one 8″ cake pan (a smaller pan would work too)

1 Cup parsley leaves, tightly packed
1/4 Cup mint leaves, tightly packed
41 grams (3/16 Cup, or a little more than 1/8 Cup) olive oil, plus oil for the pan
72.5 grams (a little over 1/2 Cup) all-purpose flour
3.75 grams (1 1/4 teaspoons) cornstarch
1.75 grams
(a little over 1/2 teaspoon) kosher salt
2 grams
(about 1/3 teaspoon) baking powder
1 large egg
, at room temperature
82 grams (a little less than 1/2 Cup) sugar

DSC_6786
First, make the herb-oil mixture. Add parsley and mint to a blender or food processor, and process at low speed. You may need to stop from time to time to stir the herbs into the blade.
DSC_6788
Increase the speed to medium and add the olive oil, a little at a time, until mixture is fully combined. The recipe says to keep the mixture a little stringy rather than obliterating it. Use a rubber spatula to scrape all of the parsley mixture out of the processor/blender and into a bowl, and refrigerate until ready to use.
DSC_6793
In another bowl, combine the flour, cornstarch, salt, and baking powder.

In a stand mixer, whip the egg for about 30 seconds.
DSC_6795
Add the sugar and turn up speed to high, running until the mixture is very thick and turns a pale yellow color, a few minutes.

Turn the mixer speed down to low and add the herb-oil mixture.
DSC_6797
With the machine on low, carefully add the dry mixture and mix until just combined.

Refrigerate the mixture for at least 6 and up to 24 hours. This apparently develops the color. I transferred the mixture right away to my cake pan, which is lined with parchment paper and oiled, but you can also use a different container for the cake-batter-resting stage.
DSC_6799

How nice, my silicone lily pad lid fits perfectly!

How nice, my silicone lily pad lid fits perfectly!


Time to bake! Preheat the oven to 340°F. Bake time will vary significantly 12-20 minutes, so be sure to use a toothpick or cake tester to check for doneness. Rotate the cake at about 8 minutes. The top should only brown slightly; turn the heat down if it becomes too brown.
DSC_6806
Let cake cool in the pan. To serve, make serving-size squares or wedges of cake. The cake may be delicious with vanilla ice cream and lemon zest. Mine was enjoyed warm with butter.
DSC_6818
The cake was excellent, particularly the texture. I must have enjoyed olive oil cakes in restaurants before, but I don’t think I ever made it at home. This cake also had a wonderful herbal aroma–honestly, the best way to describe it is a mojito smell! I was skeptical about the cake’s appeal, and wondered if the color would be “too much” for some people. One of my favorite ways to keep food from being wasted is to share it with others, so I brought several plain pieces to test on–I mean, offer to– my church bells choir-mates at rehearsal.

As it turned out, no one even hesitated to try the cake. Everyone liked it. I would like to believe it was not only because they were in a festive St. Patty’s Day mood.
DSC_6816

Orzo Cucumber Salad

Let’s talk about a basic salad. One that has the very basic formula of vegetable+grain+lemon juice+olive oil+cheese. Are you with me? I worry that you may be bored with something so simple, something I’m confident you have figured out on your own.

Yet I feel the urge to plug for the very basic salad recipe. There’s something so refreshing about the ability to bring together a satisfying and healthy dish that goes only a few steps beyond bagged salad greens and bottled dressing, something I used to use to fill in the blanks of meals and snacks here and there. I much prefer something like this, don’t you?

Take note: this is another recipe with less than 10 ingredients!

Orzo Cucumber Salad
Version inspired by Real Simple Magazine

3-4 ounces cucumber, chopped
~2 ounces another vegetable, like green pepper, chopped
2 ounces Feta/approx. 1/2 Cup, crumbled
3 small scallions, thinly sliced
1.5 Tablespoons fresh lemon juice
1.5 Tablespoons olive oil
kosher salt and black pepper

Consider that there are unlimited options for variation here. This other recipe I was considering used sun-dried tomato and red onion. Shallots would work. And if you are fresh out of fresh lemons, champagne or white wine vinegar make sense.

If you're wondering what I am doing with the rest of that sizable green pepper, it is going into this weekend's Super Bowl chili.

If you’re wondering what I am doing with the rest of that sizable green pepper, it is going into this weekend’s Super Bowl chili.


Cook the orzo according to the package directions. Drain; run under cold water to cool and shake well to remove excess water.

Prepare vegetables:
DSC_6603
Aside: as you know, I made a resolution to take prompter action on my task list. One such task was to have the kitchen knives professional sharpened, something we never had done. We have a honing device, like this:
honer
which you’re supposed to use often, and an old electric sharpener kinda like this that never provided satisfactory results. In my singular experience, it is surprisingly easy to find a traveling knife sharpener who picks up the phone, makes an appointment to come to your house at your convenience, and then accepts payment on a per knife basis. Easy peasy.

I have noticed a huge improvement in some cases. For some reason, scallions had been giving me trouble with the duller chef’s knife, and is where I felt a serious difference and ease in making thin slices.
DSC_6604

In a medium bowl, toss the orzo with the cucumber, Feta, scallions, green pepper, lemon juice, oil, 1 teaspoon salt, and ½ teaspoon pepper.

Mmm feta. Can't I just eat this?
Mmm feta and lemon juice. Can’t I just eat this?


DSC_6611
Enjoy cold or at room temperature.